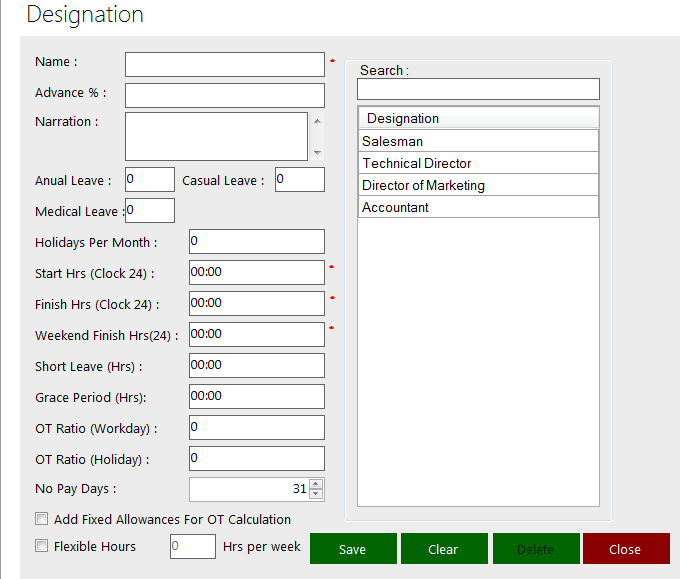
Location: Payroll >> Designation
Name text box uses to enter the Name of the employee.
Advance % text box uses to enter the Advance percentage of the designation. For an example, when designation level is increasing the Advance percentage also increasing.
Narration is for taking some notes related to the employees.
Leave Type there is three types of leaves as Annual leave, Casual leave, and medical leave.
Holidays per month allowed number of holidays is state here.
Start Hrs (Clock 24) text box uses to enter the starting time of the work.
Finish Hrs (Clock 24) text box uses to enter the finishing time of the work.
Weekend Finish Hrs(24) text box uses to enter the finishing hour of the work in weekend
Short Leave (Hrs) text box uses to enter the number of short leave hours.
Grace period (Hrs) uses to enter the grace period of the day. For an example allow for 15 minutes’ delay to the work.
OT Ratio (Workday) text box uses to enter the defined OT Ratio for a Workday. The OT ratio needs to calculate as follows.
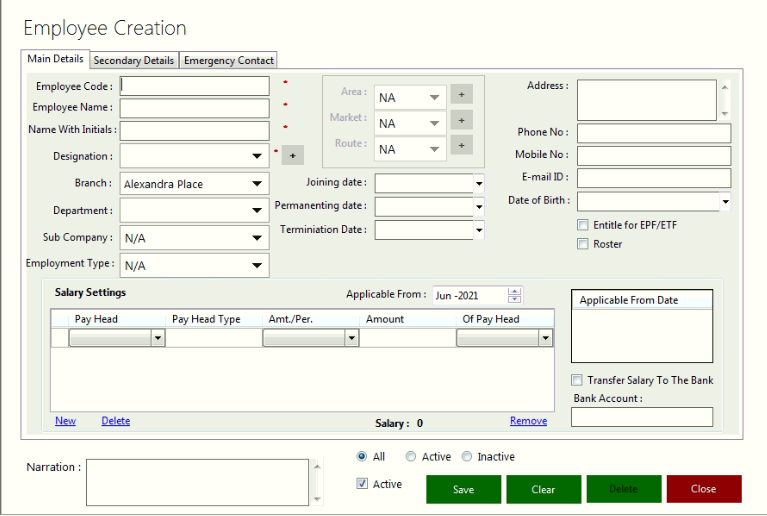
Location: Payroll >> Employee Creation
Employee Code text box uses to enter the unique code of the employee.
Employee Name text box uses to enter the Name of the Employee.
Name with Initials uses to enter the name with initials.
Designation text box uses to enter the type of the designation of the employee.
For selecting the Branch, Department or the Sub Company options are there.
Employment type could be selected from the drop down list.
Date of Birth to enter the date of the birth of the employee.
Marital Status text box uses to enter the status such as married or single.
Gender text box uses to enter the gender.
Qualification text box uses to enter the qualifications of the employee.
Blood Group text box uses to enter the type of the blood group of the employee.
If user selects the designation as Salesman the Area, Market and Route option will activate.
Joining date text box uses to enter the employee’s joined date to the company.
Permanenting date text box uses to enter the employee’s permanenting date of the company.
Termination date uses to enter the employees terminate date of the company.
Address text area uses to enter the address of the employee.
Phone No: Mobile / No: E-mail ID text boxes are used to enter the respective phone number, mobile number and email address of the employee.
If an employee is entitled for the EPF /ETF needs to check the Entitle for EPF / ETF checkbox
Salary Settings Box uses to enter the Pay Head, Pay Head Type, Amt. / Per., Amount, Of Pay Head.
Here of Pay Head Means Name of the Pay Head uses to allocate the Pay Head of the same row of the Salary Setting text box.
Applicable from text box uses to enter applicable date of the entered Salary Settings.
Total Salary will display under the salary settings.
New option uses to add new Salary Settings for particular employee.
If user adds new Salary Setting the old Salary Setting will display on Applicable from Date box.
Delete option to delete the Salary Settings
Remove Option to remove the selected row of the Salary Settings
If user needs to transfer the employee salary to the bank can check the Transfer Salary to The Bank check box and in Bank Account text box needs to enter the number of the Bank Account
Narration option uses to enter any kind of required information.
There are three radio buttons under the Salary Settings such as All, Active, and Inactive.
Active check box uses to check whether the user is active or inactive.
Close action to close the Employee Creation window.
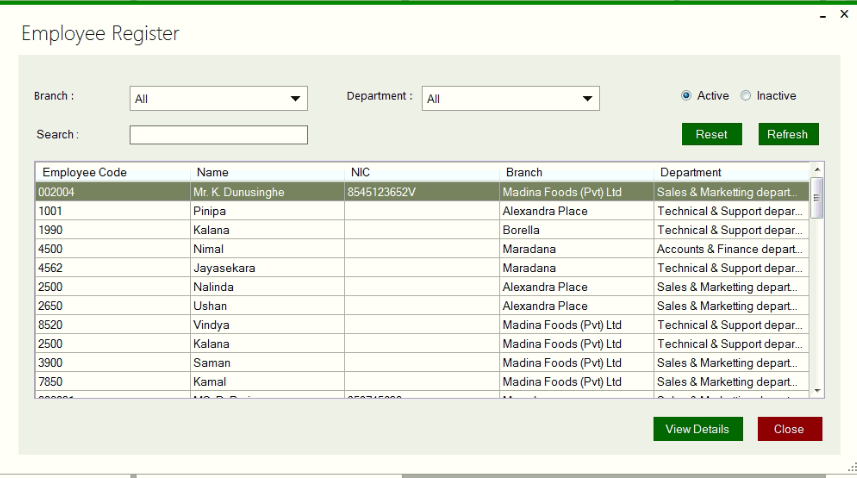
Location: Payroll >> Employee Register
Branch drop down supports to select the respective branch from the list.
Department drop down can use to select the required department of the respective branch
Search text box can use to search the employee using Employee Code, Name and NIC.
Active radio option supports to show only currently working active employees.
Inactive ratio option supports to show inactive and currently not working employees of the business.
Refresh action supports to refresh the content of the window.
View Details option supports to view the details of the selected employee.
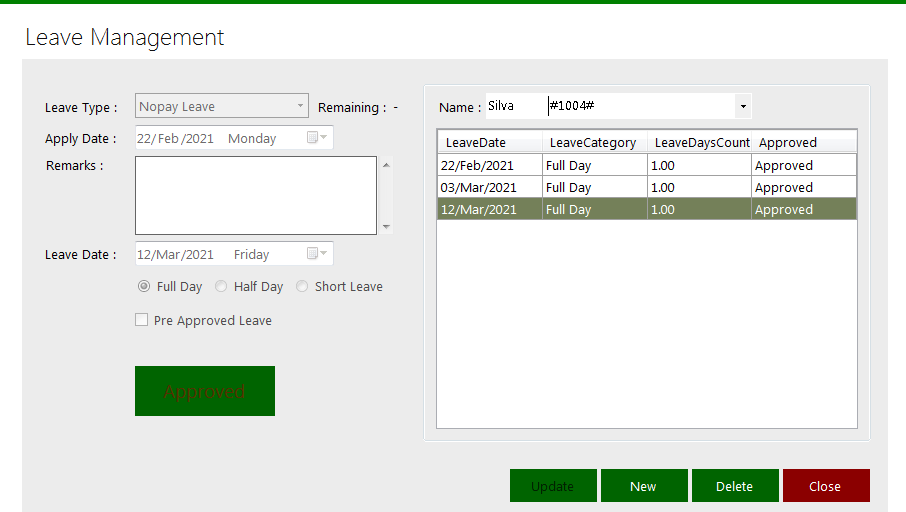
Location: Payroll >> Leave Management
Leave Type dropdown box uses to select the type of the leave such as No Pay Leave, Annual Leave, Casual Leave, and Medical Leave.
Apply Date box uses to enter the applied date of the leave.
Remarks text area uses to enter any kind of required information relevant to the Leave Management.
Leave Date uses to enter the required Leave Date of the employee.
There are three options under theLeave Date such as Full Day, Half Day, and Short Leave. The user can select any kind of option to enter the type of the leave.
Pre-Approved Leave check box can use to check whether the leave is pre-approved or not.
Name option can use to enter the name of the employee..
Under the Name text box table is displaying with Leave Date, Leave Category, Leave Days Count and Approved status. When use selects a respective row of the table the system displays all the relevant data such as Leave Type on the same window.
Location: Payroll>>Attendance Management
Once it licked on this, it appears the window below.
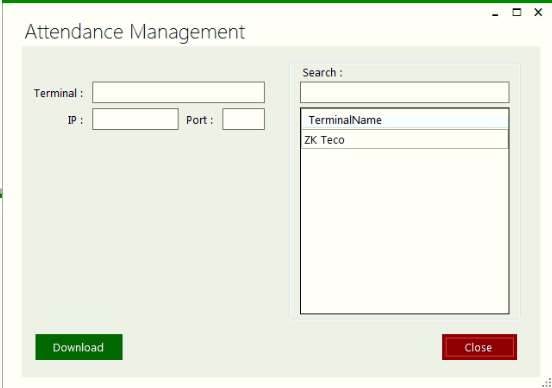
This is to download and see the finger print attendance data.
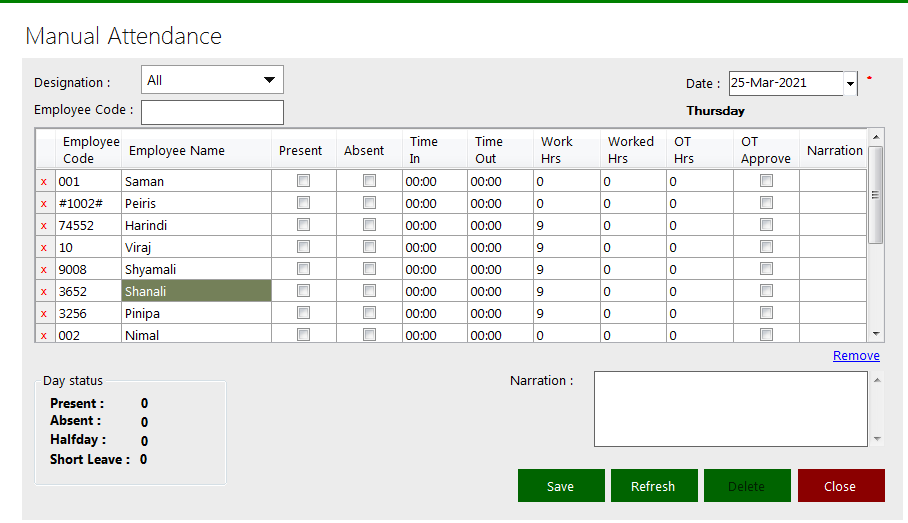
Location: Payroll >> Manual Attendance
This window supports to filter the Employees Code, Employee Name, Present, Absent, Time In, Time Out, Work Hrs, Worked Hrs, OT Hrs, OT Approve, Narration using Designation, Date and Employee Code parameters.
After retrieved the data user can check the present and absent employees and then system automatically display the Day status.
Here Day status means represent all of the Present, Absent, Half day and Short Leaveemployees of the company.
Location: Payroll >> Monthly Attendance
This window supports to filter the the Employees Code, Employee Name, Working Days, Leave Days, Present, Half Day, Short Leave, Absent, O/T Hours, LOP using Designation, Month and Employee Code parameters.
After retrieved the data user can check the status of the employees.
Refresh option to refresh the all of the data in the tables.

Location: Payroll >> Roster Management
Date select boxes use to select the date from date picker and enter the starting date and ending date.
Branch drop down uses to select the respective branch of the business.
Search option support to search employee by name.
Roster Type in Roster Allocation supports to select the type of roaster which needs to assign to the employee.
Schedule action supports to allocate the distinct rosters to working days of the company.
Roster Type in Roster Type box supports to add the new name of roaster type.
Short Code supports to enter the short code of the Roster Type.
Start Time supports to enter the start time of the roster
End Time supports to enter the end time of the roster
Save action support to save the roster.

Roster is a list or plan showing turns of duty for individuals or groups in an organization.
Location: Payroll >> Departments
This is to create various department of the company if needed.

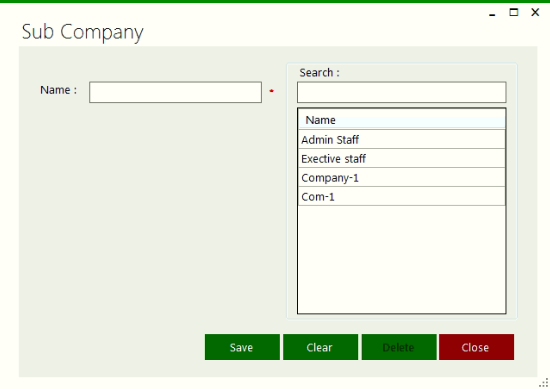
Location: Payroll >> Sub Department
This is to create various sub departments under each main department
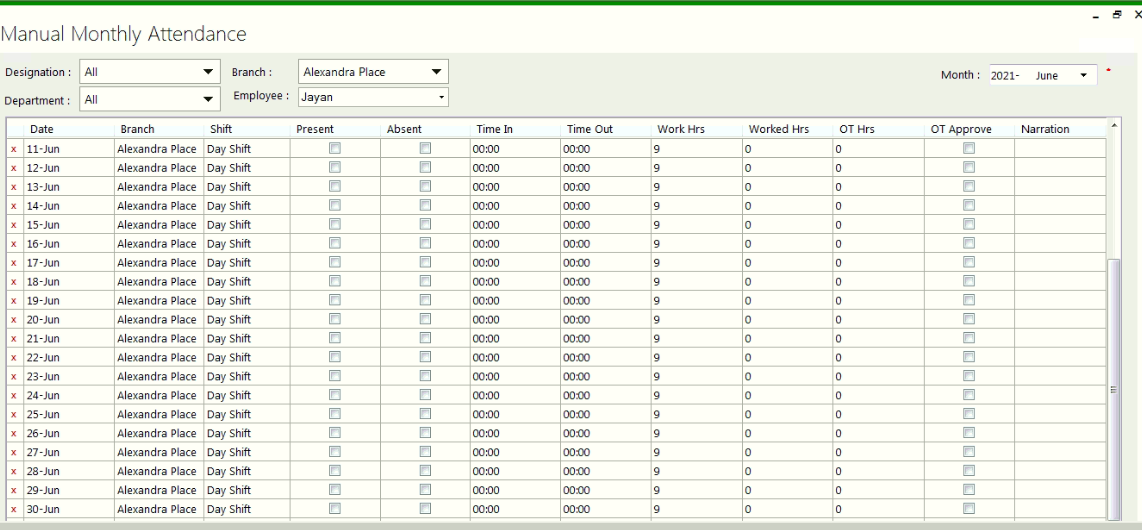
Location: Payroll >> Manual Monthly Attendance
Designation Select the respective designation of the employee.
Department Select the name of the department.
Branch Select the name of the name of the branch.
Month Select there quire month.
Narration supports to enter any kind of extra detail relevant to the employee attendance.
After entering all the details to the Manual Monthly Attendance window user can load the searched detail on to the table.
User can manually mark the Present, Absent, Time In and Time Out.
After the user enters the time in and time out the system automatically calculates the Worked Hrs.
If employee has worked more than his or her allocated work hours then the extra hours will calculated by the system itself and then display on OT Hrs column. After that the authorized employee can approve the OT using OT Approve check box.
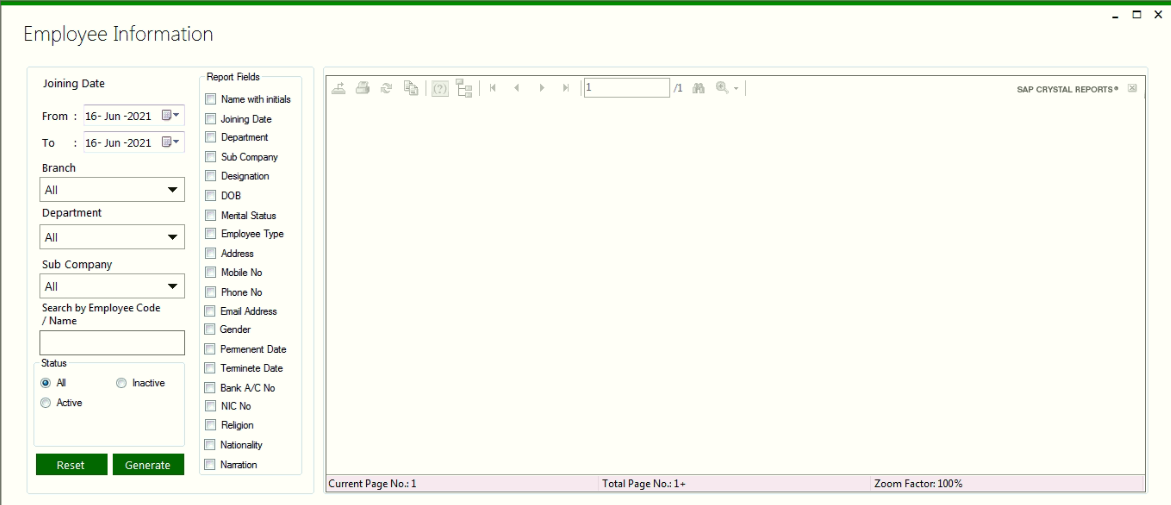
Location: Payroll >> Payroll Reports >> HR Reports >> Attendance Details
This window supports to filter the employee information with selected reporting field
From and To select boxes support to enter the required date range.
Branch select box support to enter the selected branch.
Department select box supports to enter the selected department.
Sub Company select box supports to enter the selected sub company.
Search by Employee Code / Name supports to enter the employee name or employee code
Status supports to select all the inactive and active employees, active employees and inactive employees
Report Field supports to select the required field to display on the report.
Reset supports to refresh the content.
Generate supports to generate the report with selected content.
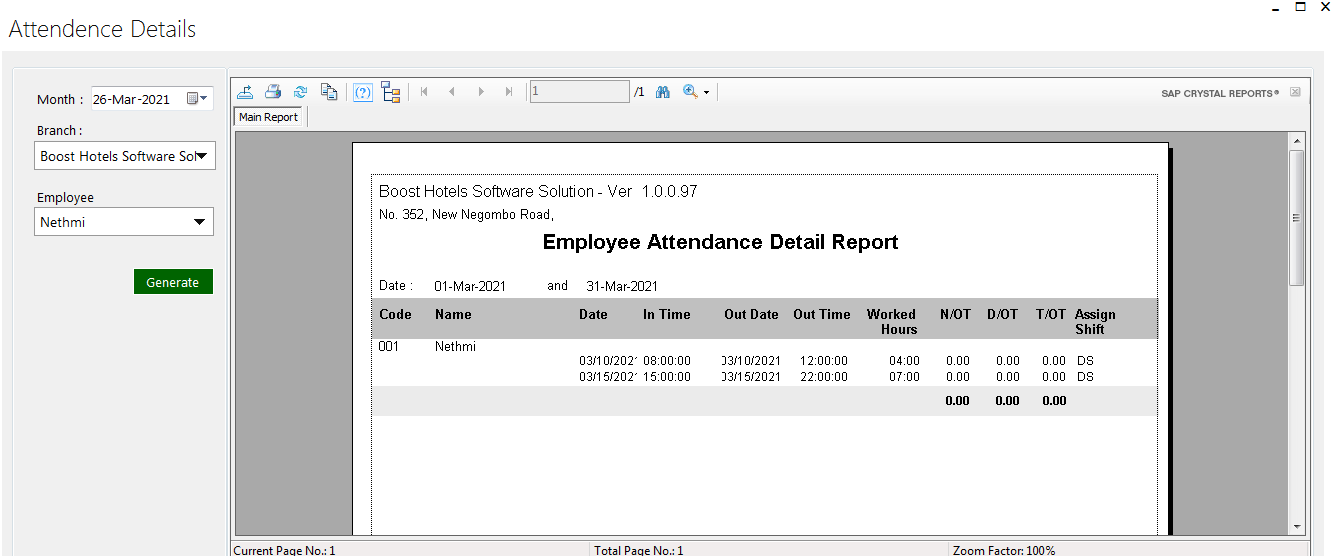
Location: Payroll >> Payroll Reports >> HR Reports >> Attendance Details
When user select the required Month, Branch and Employee the system displays the Attendance Detail Report with respective details such as;Employee Code, Employee Name, Date, In Time, Out Time, Worked Hours, N/OT, D/OT, T/OT and Assign Shift.
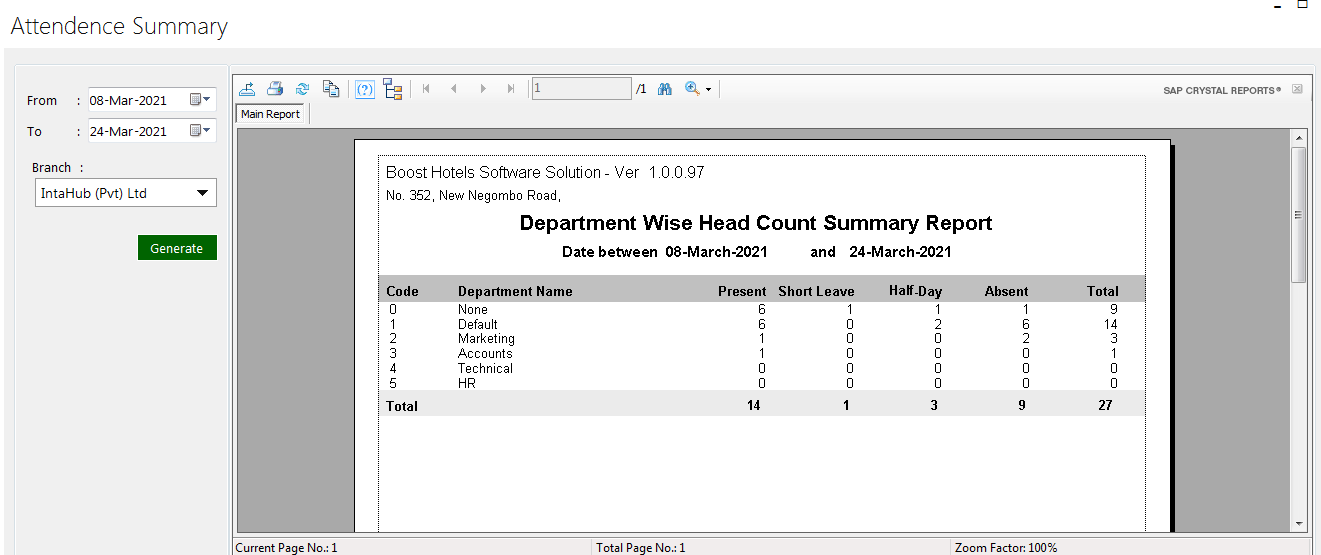
Location: Payroll >> Payroll Reports >> HR Reports >>Attendance Summary
Window supports the user to select the From date, To date and Branch. Then system generates the department wise head count summary report.
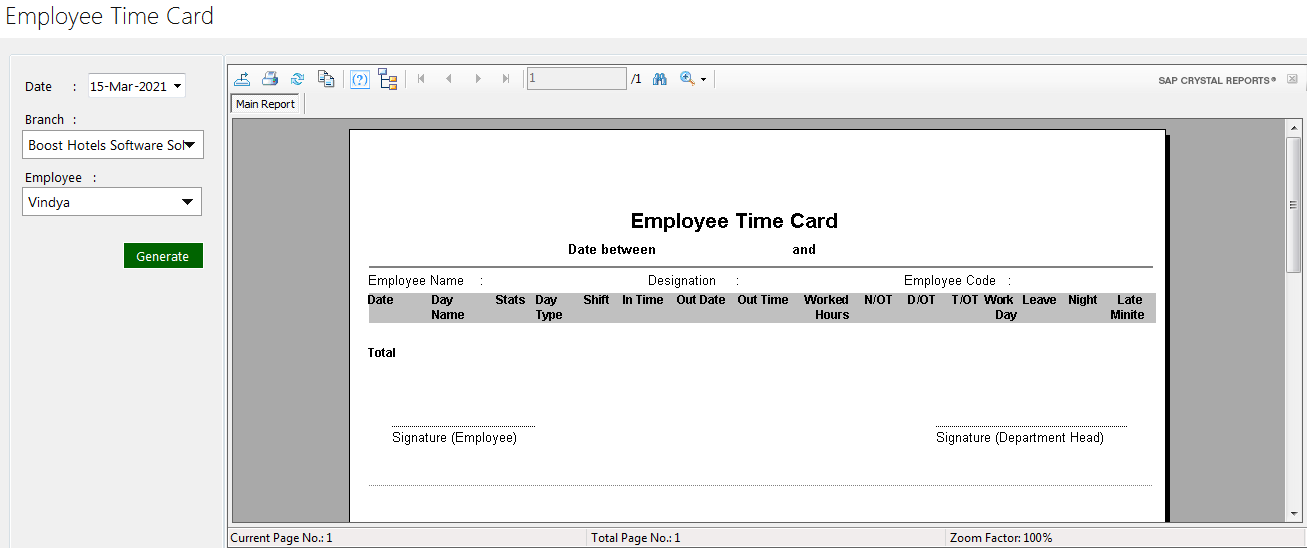
Location: Payroll >> Payroll Reports >> HR Reports >>Employee Time Card (ETC)
ETC a method for recording and tracking the amount of an employee's time spent on each job
Window supports to select the Date, Branch and Employee and then generate Employee Time Card.
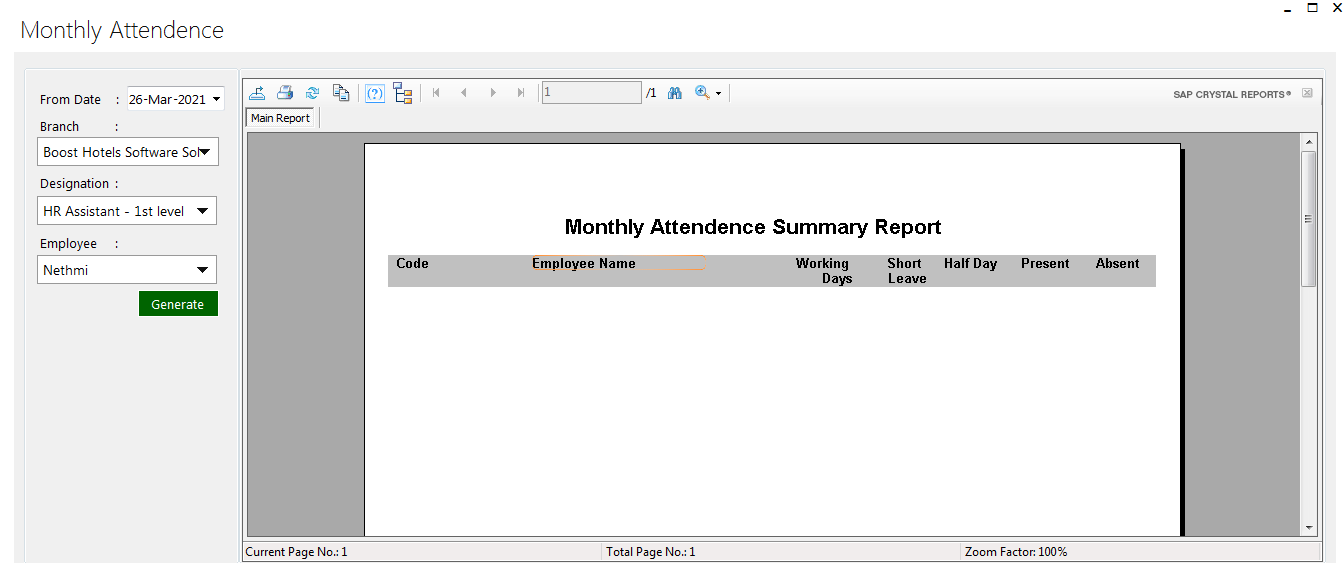
Location: Payroll >> Payroll Reports >> HR Reports >> Monthly Attendance
Window supports to select From Date, Branch, Designation and Employee then generate the Monthly Attendance Summary Report.
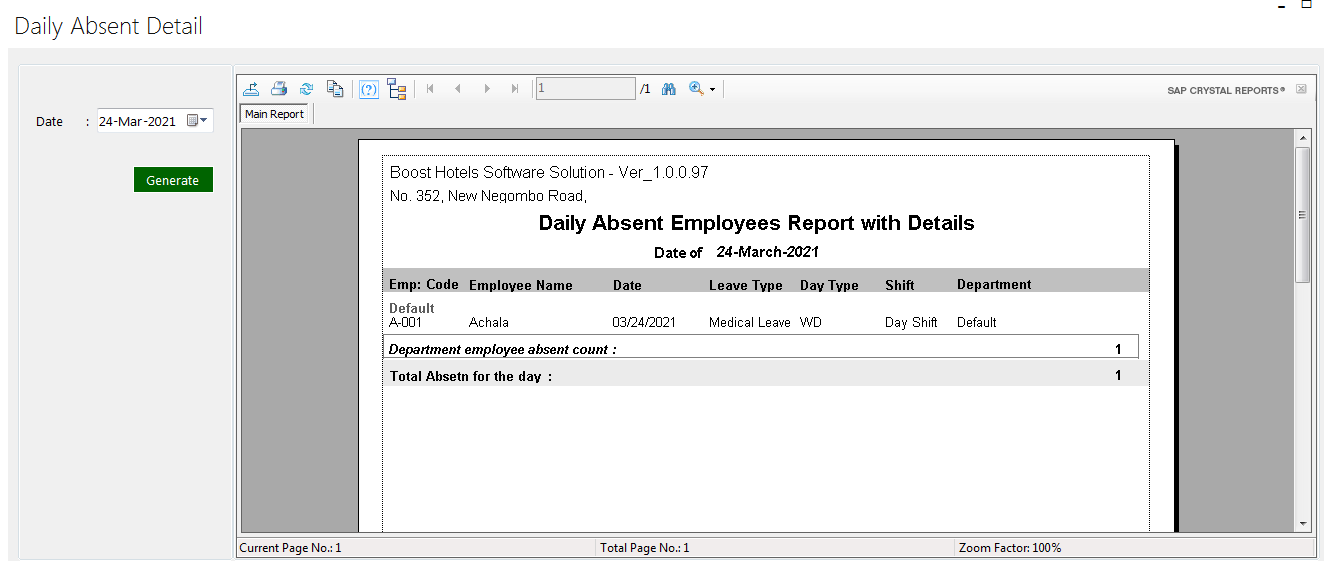
Location: Payroll >> Payroll Reports >> HR Reports >> Daily Absent Detail
Window supports to enter Date and generate Daily Absent Employees Report with Details.
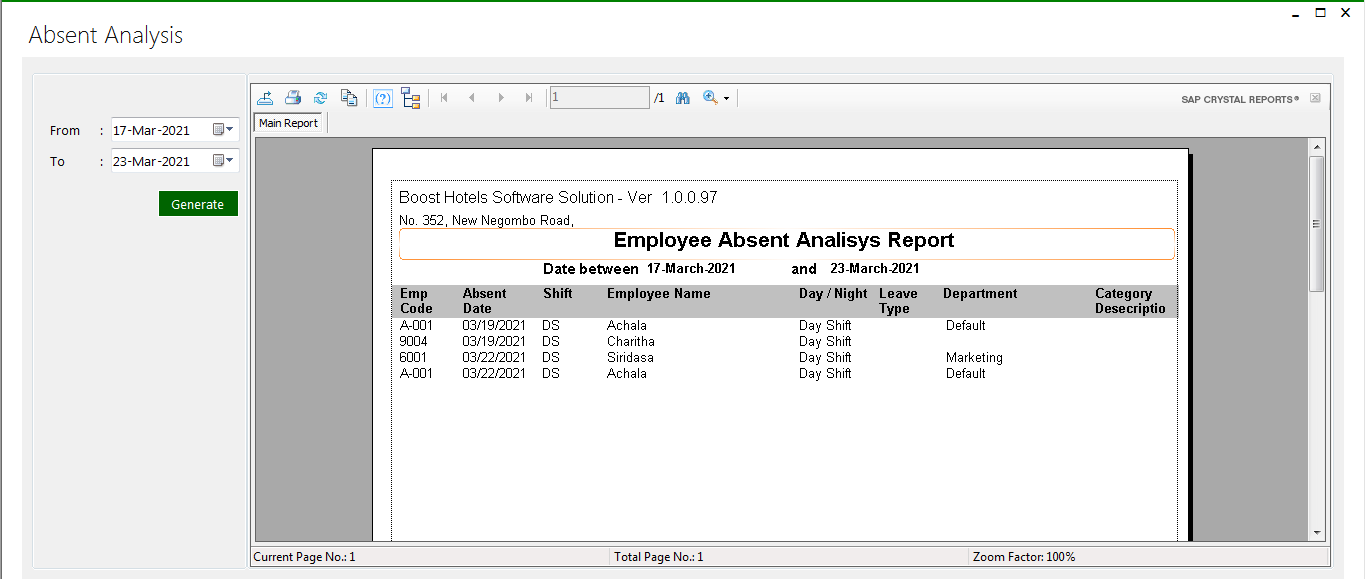
Location: Payroll >> Payroll Reports >> HR Reports >> Absent Analysis
Window supports to enter From and To date, then system generates Employee Absent Analysis Report.
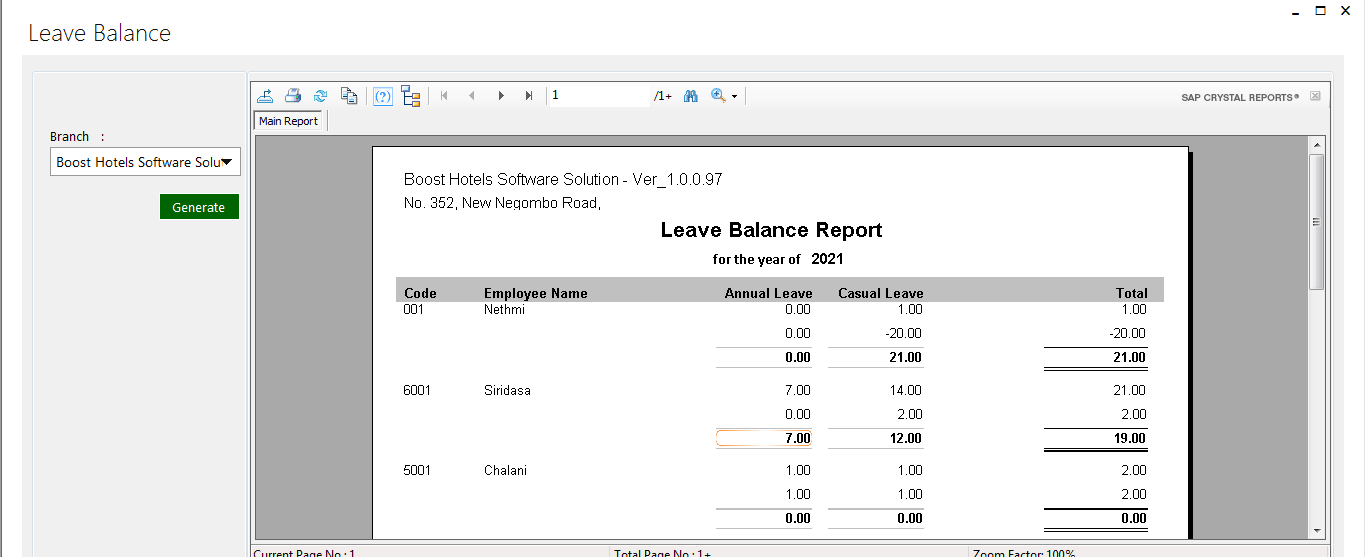
Location: Payroll >> Payroll Reports >> HR Reports >> Leave Balance
Window supports to select the Branch and then system generates the Leave Balance Report.
The Report contains difference between entitled leaves and actual leaves.
Location: Payroll >> Payroll Reports >> HR Reports >> Roster Details Report
Select required Year, Month, Branch and Department and then select the Generate button to generate the Roster Detail Report..

Location: Payroll >> Payroll Reports >>Payroll - Advance Payment
o The report displays advance payment detail of a respective employee.
o From Date dropdown box supports to select the starting date.
o To Date dropdown box supports to select the ending date.
o The radio options such as All, Active, Inactive supports to select the all of the employees in the company, active employees of the company and inactive employee of the company respectively.
o Employee dropdown supports to select the employee of the company.
o Salary Month supports to enter the advance deduction month of the salary.
o Branch dropdown supports to enter the Branch of the company.
o Currency dropdown supports to select the required currency type.