
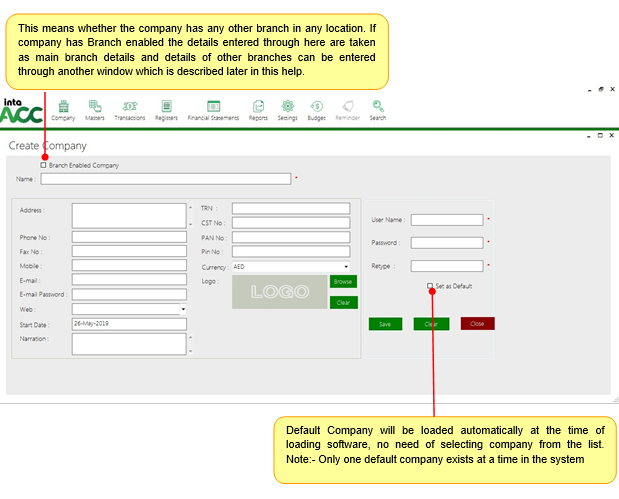
Click on Company > Create. A window appears as shown below,
How to access PR?
This is for creating a new company data base. Here company details such as name, address, email, phone etc can be entered. A super power admin is created while creating company. We can upload logo of the company if any and can set the currency of the company.
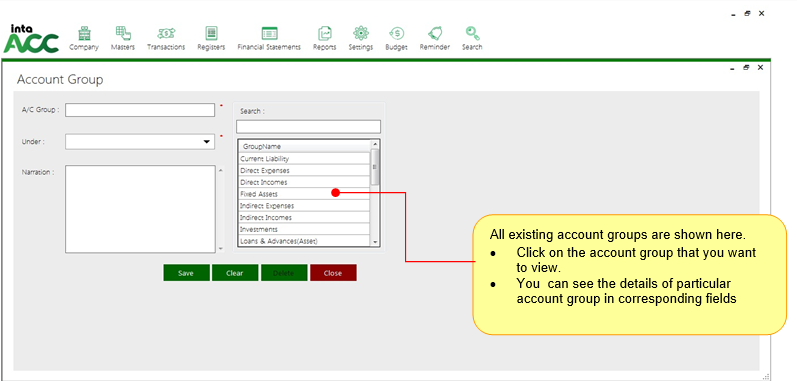
Click on Masters > Accounts> Chart of Account Group.A window appears as shown below
This is to create various account groups. Almost all groups for transaction are in-built in this software. These in-built groups cannot be edited or deleted.
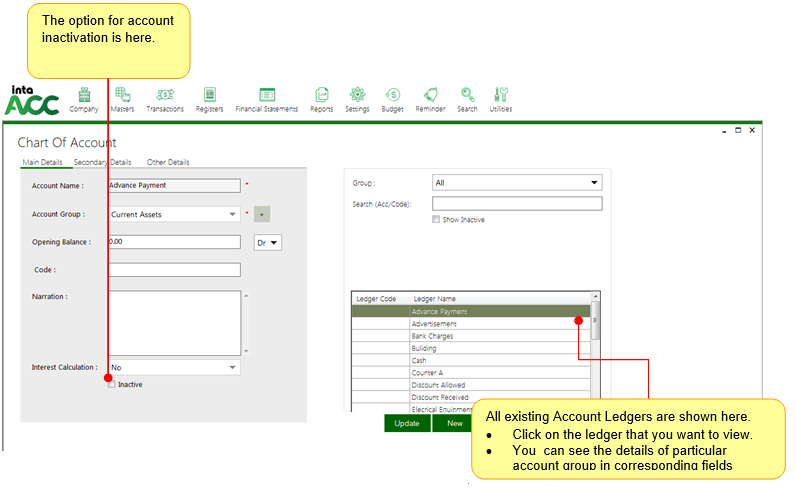
Click on Masters > Accounts > Chart of AccountA window appears as shown below
Access: In order to approve the PO user needs to select the PO and then needs to select the approve button.
This is for creating various account ledgers under each group. A few in-built ledgers are already created, which cannot be edited or deleted
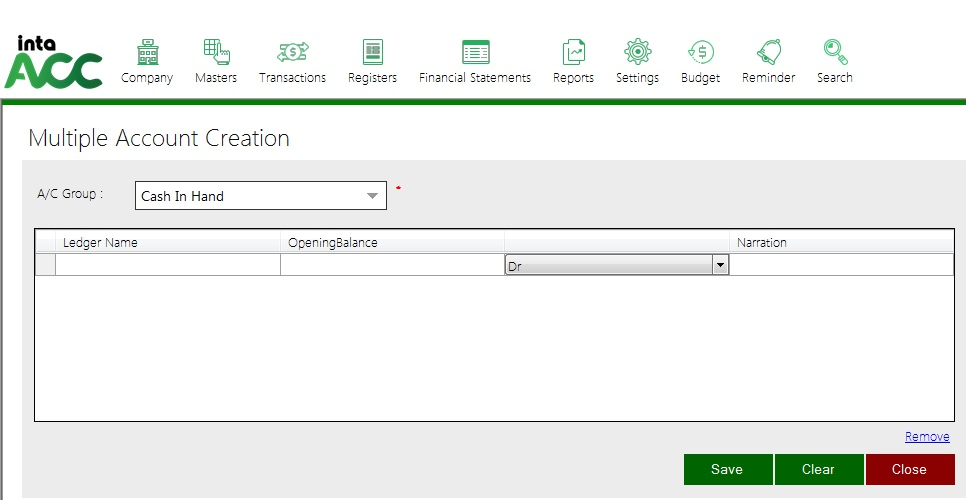
Click onMasters > Multiple Account LedgersA window appears as shown below
This is the option for creating multiple account ledgers at a time under a group.
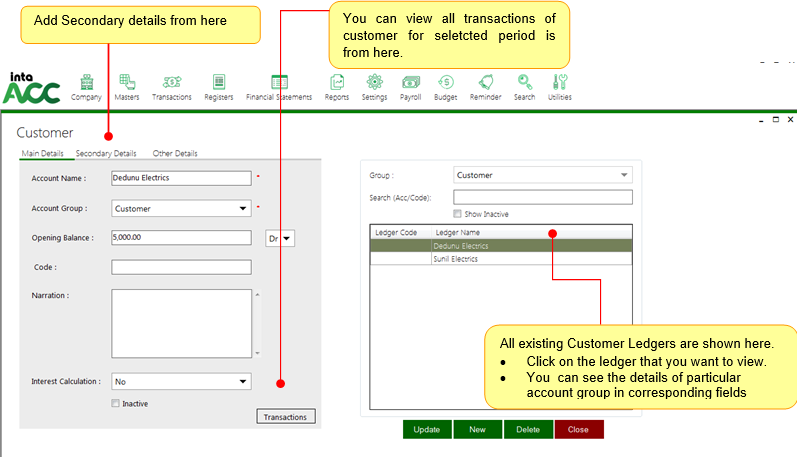
Click on Masters > Vendor / Customer - CustomerA window appears as shown below.This is to create Customer Ledger.
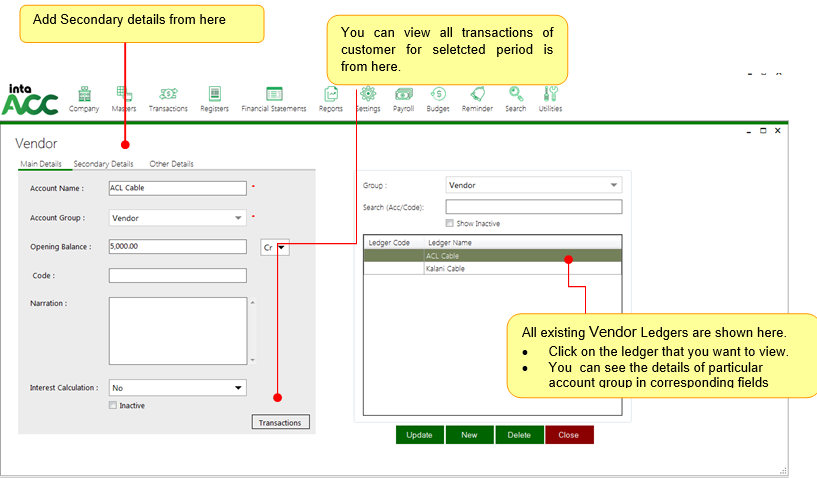
Click on Masters > Vendor / Customer - VendorA window appears as shown below.This is to create Vendor Ledger.
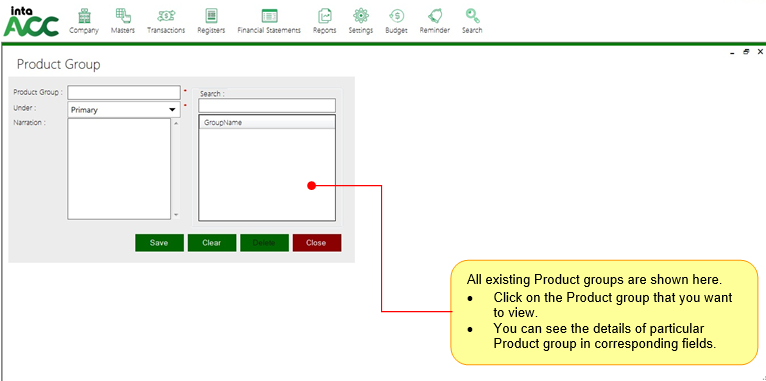
Click on Masters > Products > Product Group A window appears as shown below.This is to create various product groups.
Click on Maters > Products > Product A window appears as shown below.This helps to store the details of products.
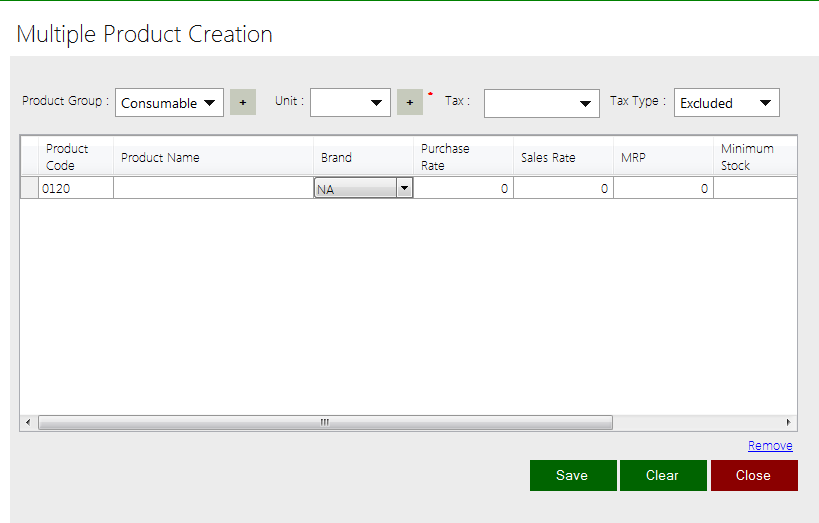
Click on Masters > Products > Multiple Product Creation
Awindow appear as shown below. From here, you wll be able to create multiple products in one go which have same product group, unit, tax & tax type.
Click on Masters > Products > Product Register
A window appears as shown below,It is the list of entire products in current financial year from where user can do filtration as they wish
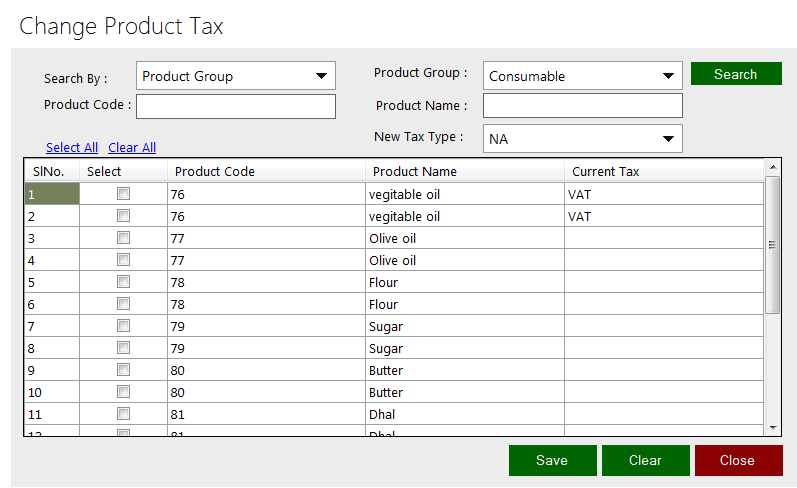
Click on Masters > Products > Change product tax. . A window appears as shown below
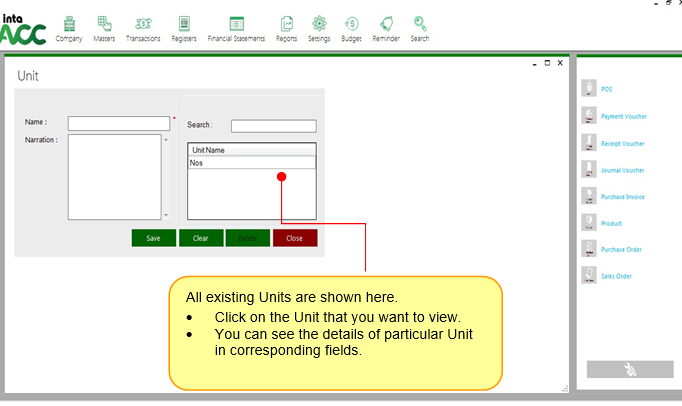
Click on Masters > Products > Unit A window appears as shown below:This is to create various Units.
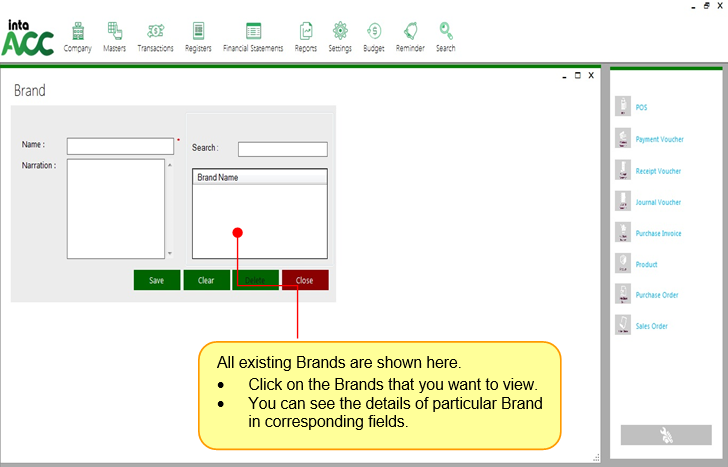
Click on Masters >Products > Brand. A window appears as shown below:This is to create various Brands.
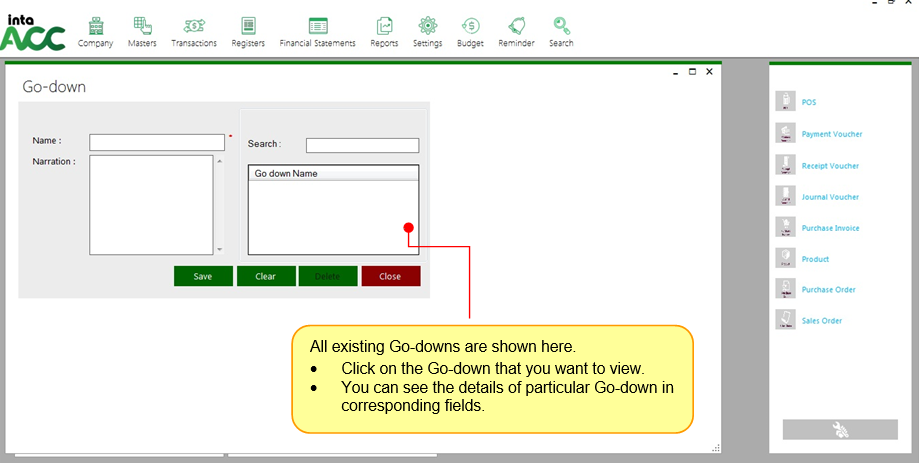
Click on Masters > Products > Go-down A window appears as shown below:This is to create various Go-downs
Click on Masters > Products > Rack A window appear as shown below
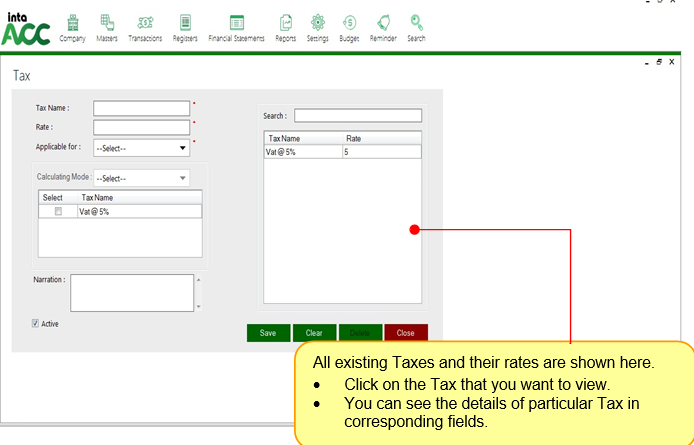
Click on Masters > Tax.
This is to create various Taxes. Two types of taxes can be created in this form
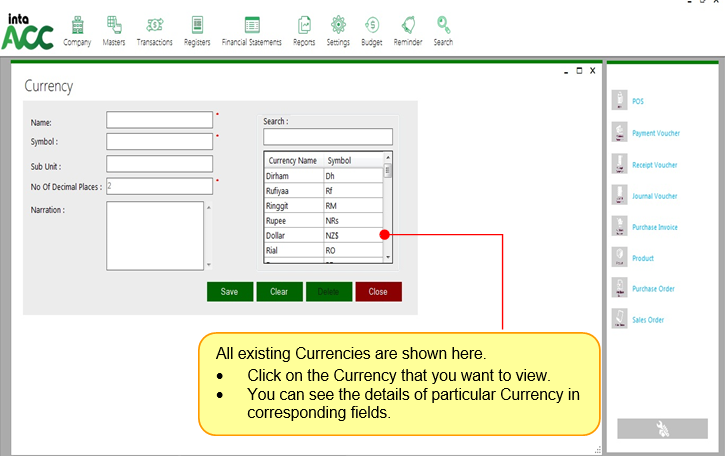
Click on Masters > New Currency
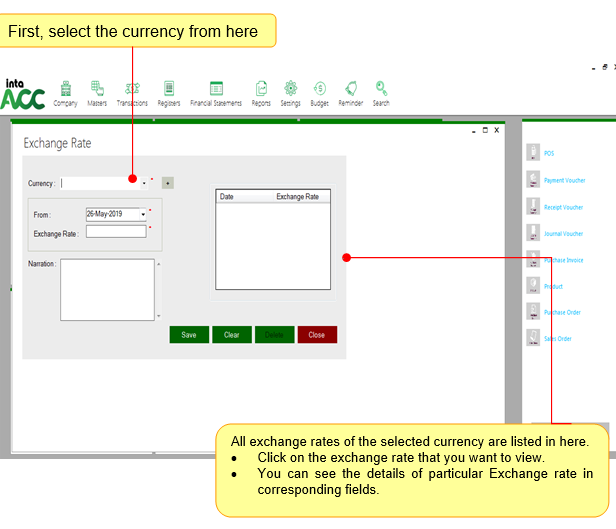
Click on Masters > Currency > Exchange Rate
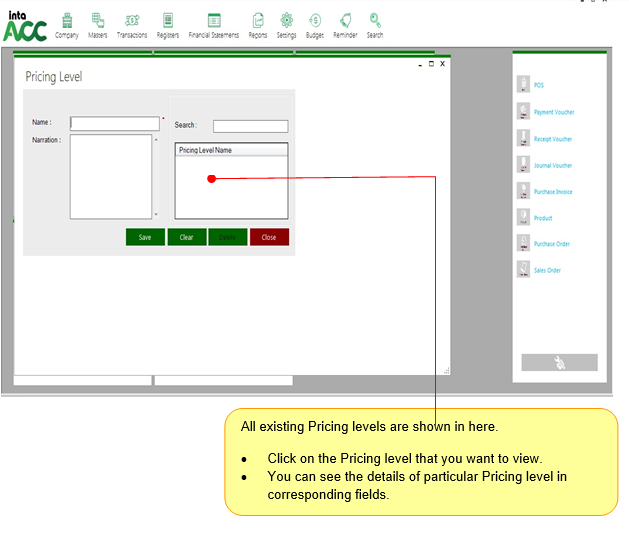
Click on Masters > Pricing Level.
Click on Masters > Pricing Level.
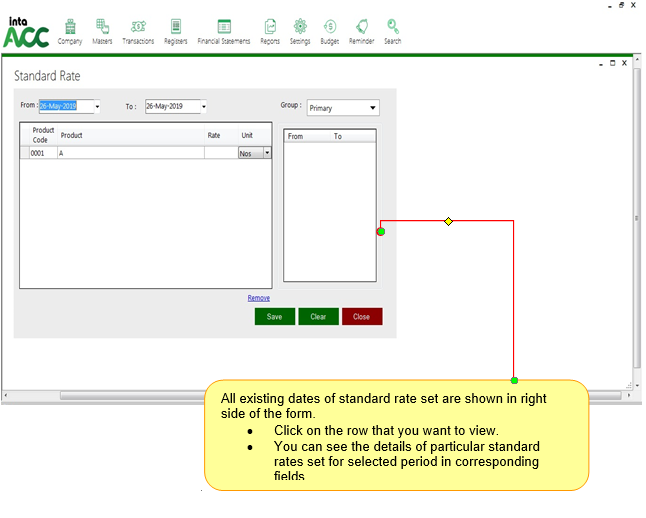
Click on Masters > Standard Rate.
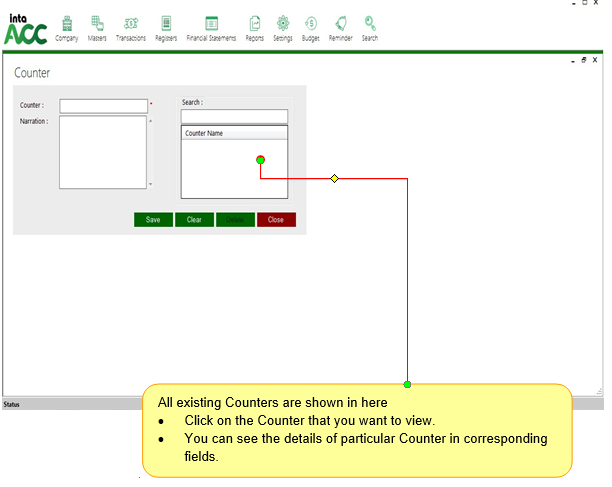
Click on Masters > Counter.
Click on Masters > Sale > Area.

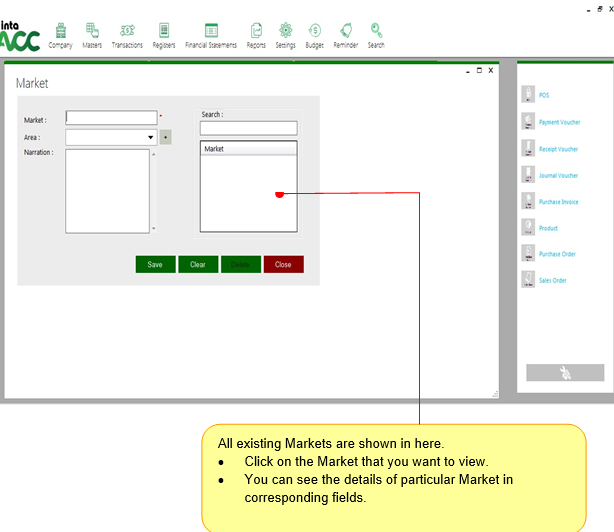
Click on Masters > Sale > Market.
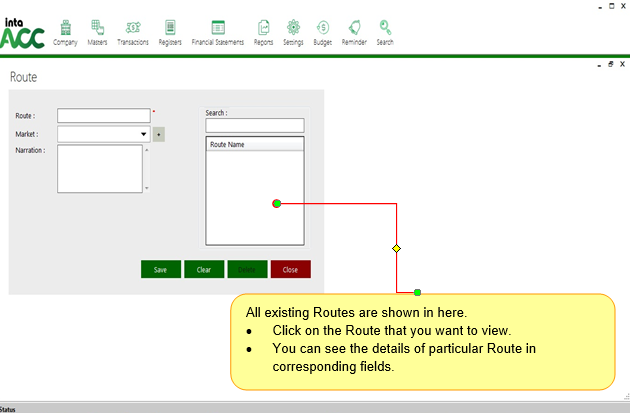
Click on Masters > Sale > Route.
Click on Transactions > Customers >Sales Quotation.

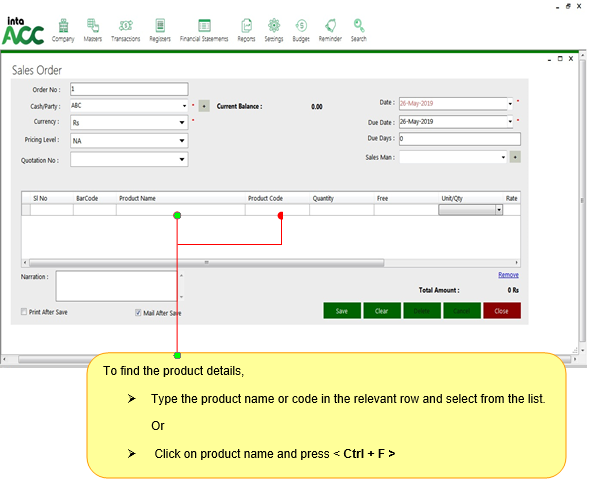
Click on Transactions > Customers >Sales Order
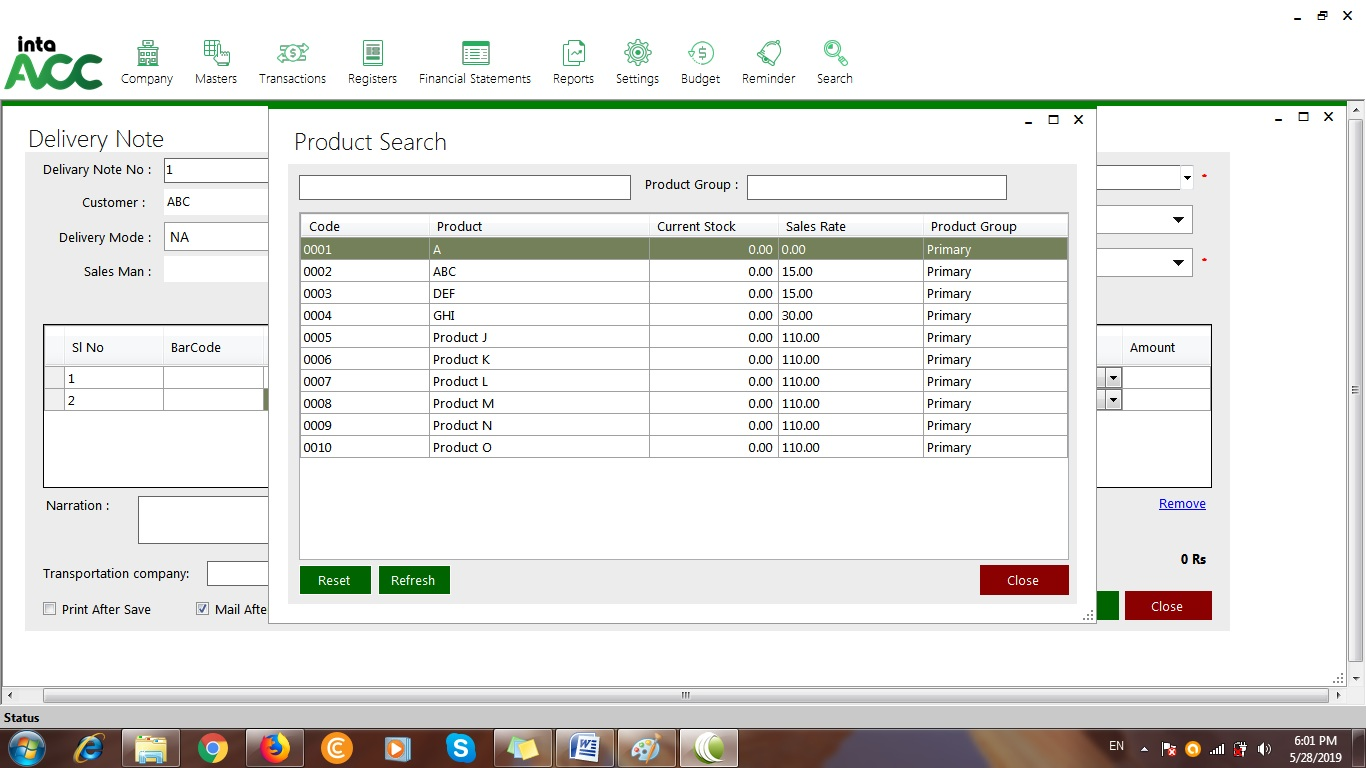
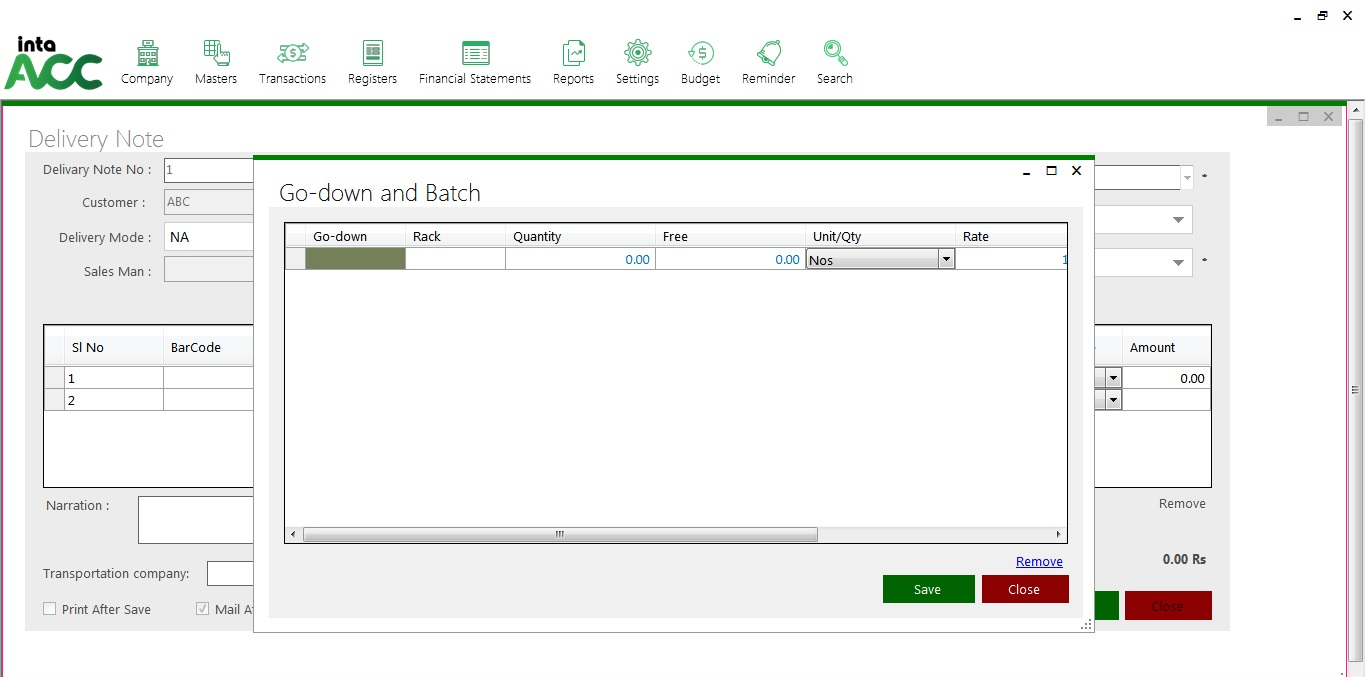
Click on Transactions > Customers > Delivery Note
Click on Transactions > Customers > Rejection In.
Add a new Rejection In
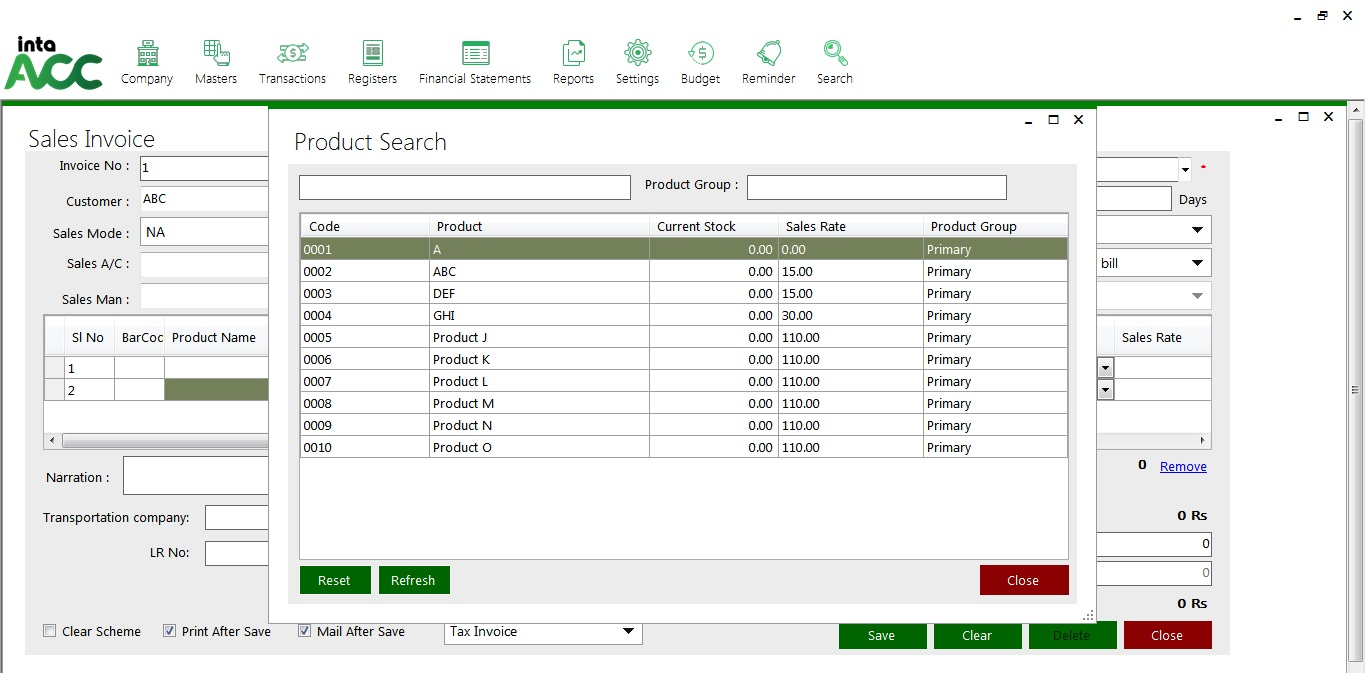
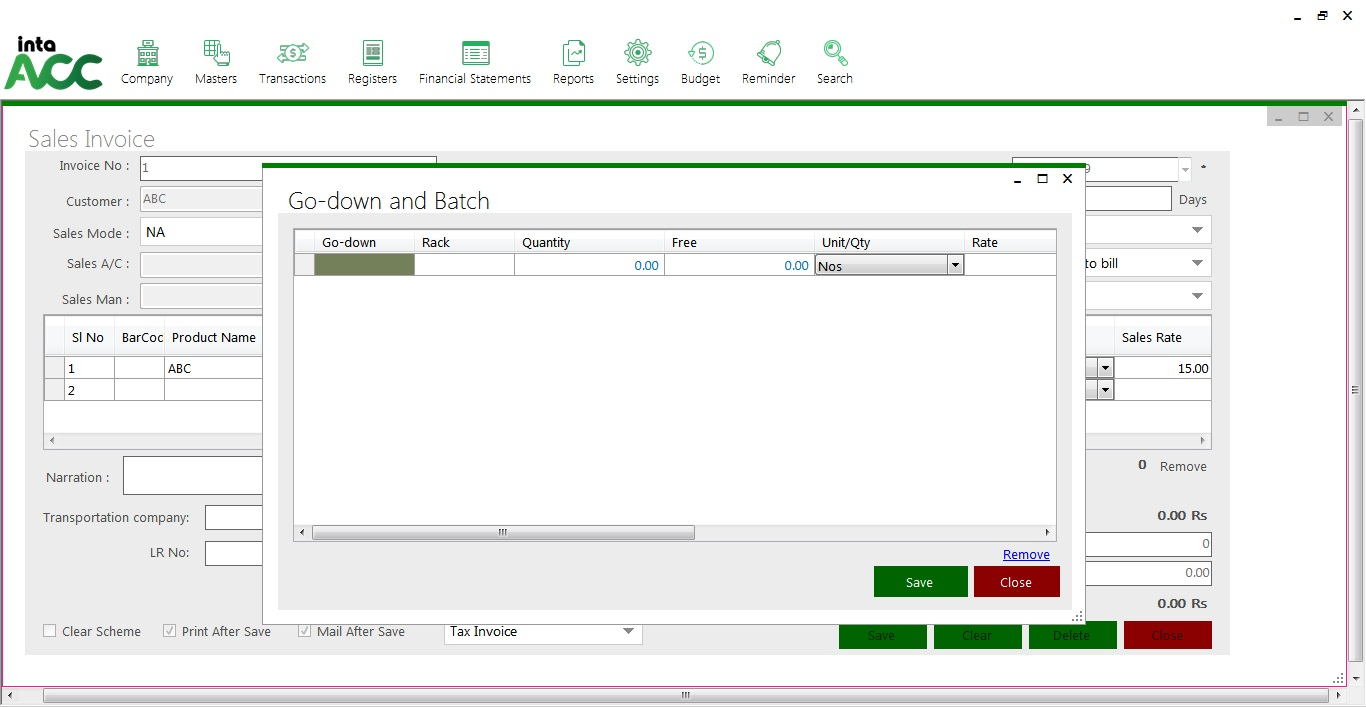
Click on Transactions > Customers > Sales Invoice. (CTRL + F8)
Add a new Sales Invoice
Click on Transactions > Customers > Sales Return
Add a new Sales Return
Click on Transactions > Customers > Receipt Voucher. (CTRL + F6)

Click on Transactions >Vendors > Purchase Order.
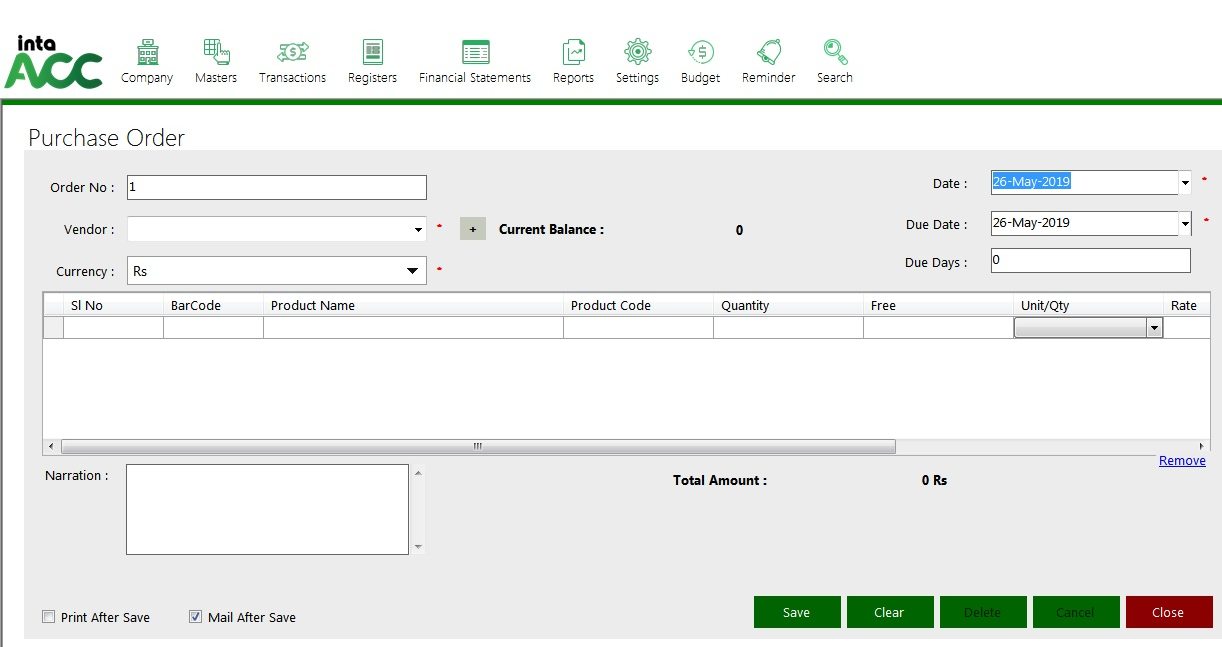
Add a new Purchase Order
Click on Transactions > Vendors > Material Receipt
Add a new Material receipt
Click on Transactions > Vendors > Rejection Out.
Add a new Rejection Out
Click on Transactions > Vendors > Purchase Invoice. (CTRL + F9)
Add a new Purchase Invoice
Click on Transactions > Vendors > Purchase Return.
Add a new Purchase return
Click on Transactions > Vendors > Payment Voucher. (CTRL + F5)

Add a new Purchase Voucher
Click on Transactions > Bank Deposit
Add a new Purchase Order
Click on Transactions > Bank Transfer. (CTRL + F4)
Add a new Bank Transfer
Click on Transactions > Journal Voucher. (CTRL + F7)
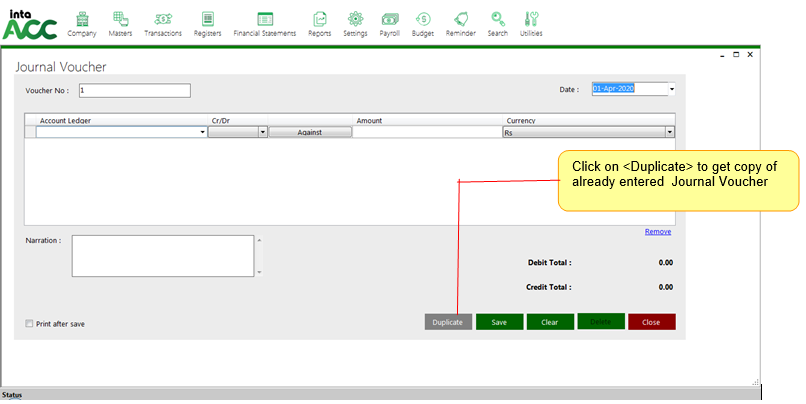
Add a new Journal Voucher
Click on Transactions > PDC Payable
Add a new PDC Payable
Click on Transactions > PDC Receivable
Add a new PDC Receivable
Click on Transactions > PDC Clearance
Edit PDC Clearance
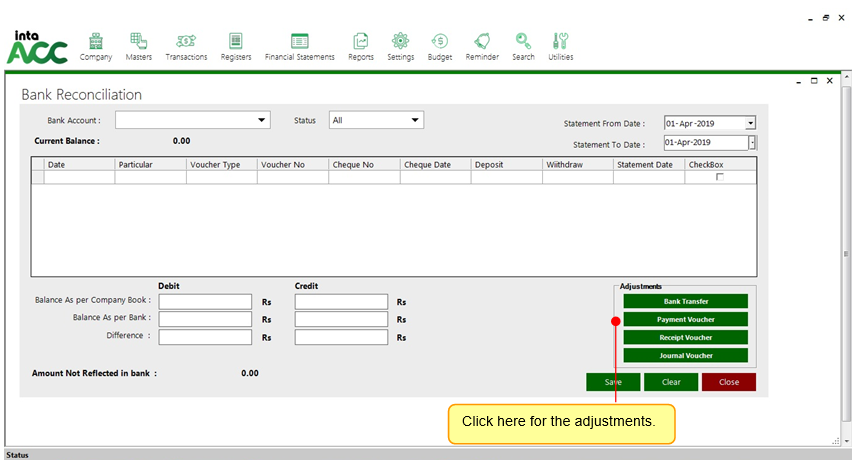
Click on Transactions > Bank Reconciliation.
Click on Transactions > Purchase Invoice (Accounts Only).
Add a new Purchase Invoice
Click on Transactions > Sales Invoice (Accounts Only).
Add a new Sales Invoice (Accounts Only).
Click on Transactions > Petty Sale
Add a new Petty Sale
Click on Transactions > Manufacturing Journal
Add a new Manufacturing Journal
Click on Transactions > Service Voucher
Add a new Service Voucher
Click on Transactions > Stock > physical Stock.
Add a new Physical Stock
Click on Transactions > Stock > damage Stock
Add a new damage Stock.
Click on Transactions > Stock >Go-down to Go-down transfer
Add a new Go-down transfer
Click on Transactions > Stock > Branch to branch transfer
Add a new Branch to branch transfer
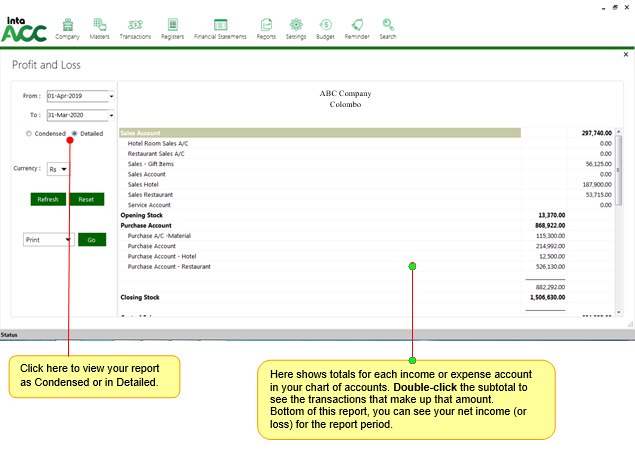
Click on Financial Statements > Profit & Loss
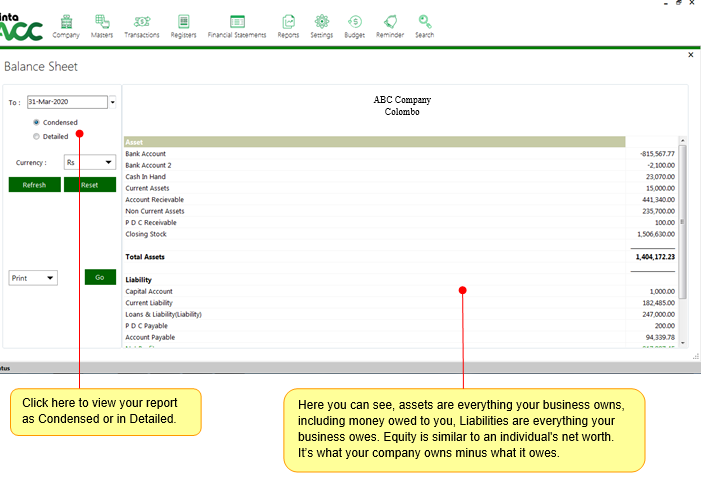
Click on Financial Statements > Balance Sheet.
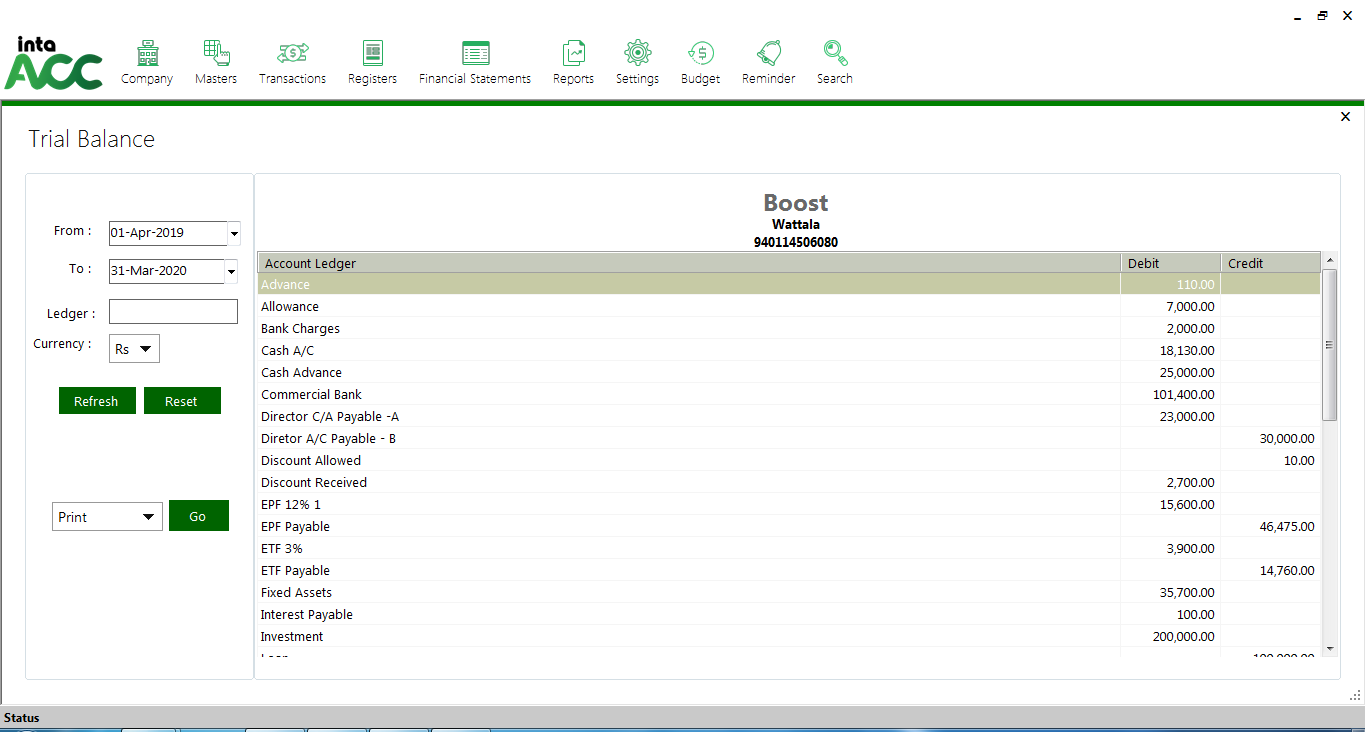
Click on Financial Statements > Trial Balance.
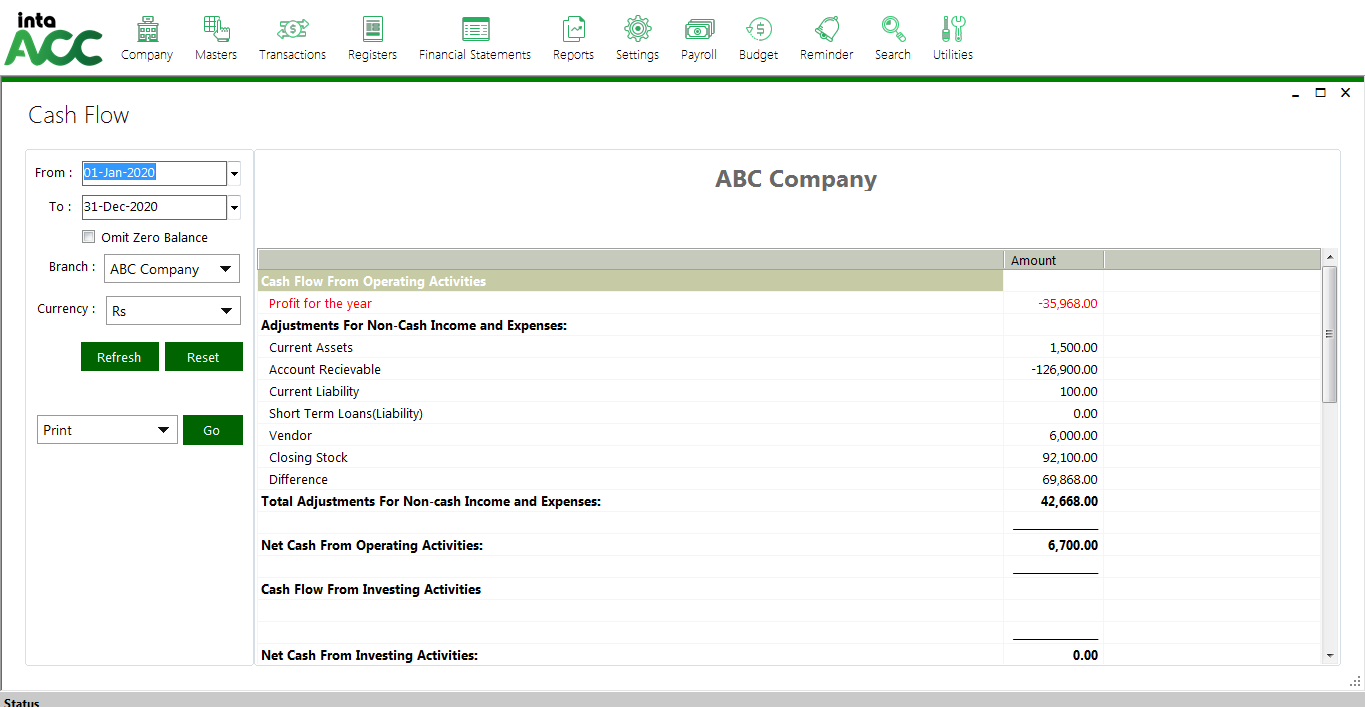
Click on Financial Statements > Cash Flow.
Click on Settings > Change Current Date. (ALT + F2 )
Click on Settings > Financial Year > New.
This is for adding new financial year. A new financial year can be saved only if all active financial years are closed. After entering new financial year click on "Save"
Click on Settings > Financial Year > Edit.
This is for changing period of existing financial year. Only period of active financial year can be changed here. After entering the period click on "Save" to save the changes
Click on Settings > Financial Year > Change
This is for changing current working financial year. Here all financial years of company are listed from where user can select one. After selecting a financial year current financial year will be changed to this year
Click on Settings > Financial Year > Close.
This is for closing active financial year. Transactions cannot be done in a closed financial year but user can open a closed financial year if they want to do so. Confirmation is asked before closing a financial year