
Location: Fixed Assets >> policy
This is to create depreciation or appreciation policy of each non-current asset. The window is shown as follows.
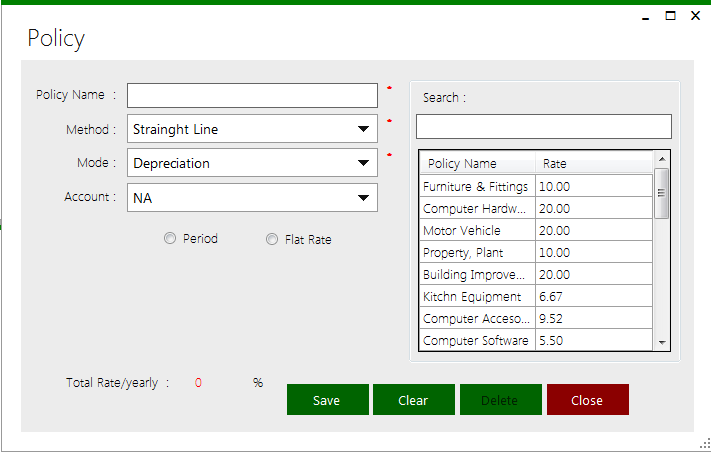
Policy Name: This is to enter the policy name of the particular fixed asset.
Method: Here, it includes two methods of depreciation under the drop down as Straight line or Reducing balance method.
Mode: This means whether it is Depreciation or Appreciation
Account: In here, it needs to select the particular Accumulated depreciation account where the depreciation of the asset should be credited to. The account should have created before and once it clicked on the drop down then it appears all accounts which have been created. Then the user can select the particular account.
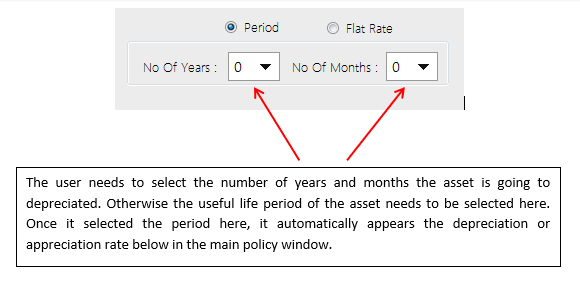
Period: Once the user clicked on here it appears a small grid as shown below.
Flat Rate: Instead of selecting a period, here is the option of entering a flat rate directly.
Save Button: Once it entered the all details, it can be save the details by click on this save button.
Clear Button: Once it clicks on here it cleared the filled details.
Delete Button: If need to delete a saved policy, by clicking on this delete button the user could be deleted.
Close Button: This option is to close the window.
Location: Fixed Asset >> Fixed Assets Products
Once the user went through the path, it appears the window of product creating as shown below.
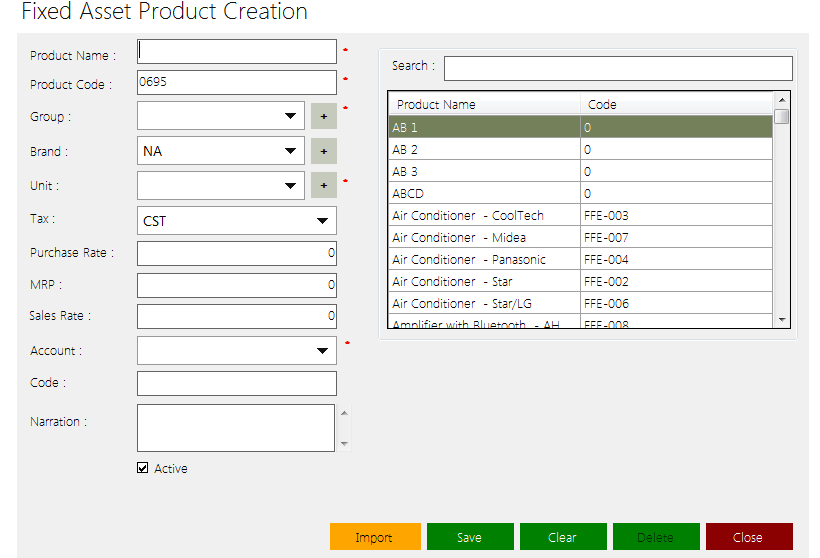
Product Name: This is to enter the name of the particular asset.
Product Code: This is the system generated code for each asset.
Group: The user can select the asset the group here. Once it clicked on the drop down icon, it appears all fixed assets groups created. Incase if it has not been created the group, here also has the option to create the group. Once it clicked on + signs next to Group, it directed to the group creation grid as shown below.
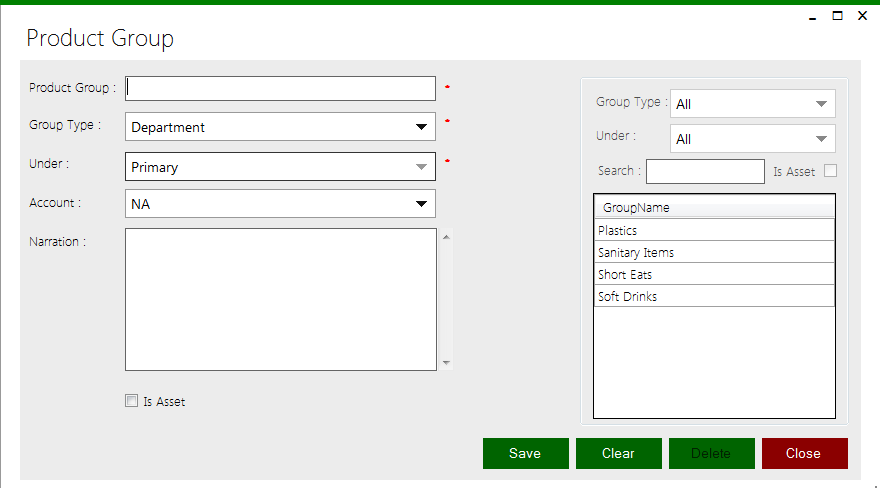
Product group: The name of the group should enter here.
Group Type: If there any sub group categories they can be added here.
Under: This is under which account the Group comes from.
Account: The asset account which need to pass the asset value into.
Narration: The users can keep any note specialized for the particular group.
Is Asset: Once it has completed the above details, it needs to click on this option, if the created group is for fixed assets.
Brand: This is to create and select the Brand of the asset.
Unit: This is to entered or created the unit of measurement
Tax: The relevant taxes can be assigned from here.
Purchase Rate: Asset purchase rate can be entered here.
MRP: This is to enter Minimum or Maximum Retail Price of the Asset.
Sales Rate: Sales or Disposal value of the asset could be entered here
Account: It could be selected the relevant fixed asset account from the drop down list appears here.
Code: The Company created asset code could be entered here.
Narration: Special notes related to the Asset could be kept here.
Active: The asset status could be selected here as it active or not.
IMPORT: This button is to import Assets details into the system from a excel sheet. Once it clicked on here, the user directed to another grid where he or she could be done the adjustments.
CLEAR: The filled details could be cleared by clicking on here.
DELETE: Saved data could be deleted by clicking on here.
CLOSE: This is for closing the window.
Location: Fixed Asset >> Fixed Asset Purchase
Fixed asset purchase invoices could be raised from here. The interface of the invoice as follows.
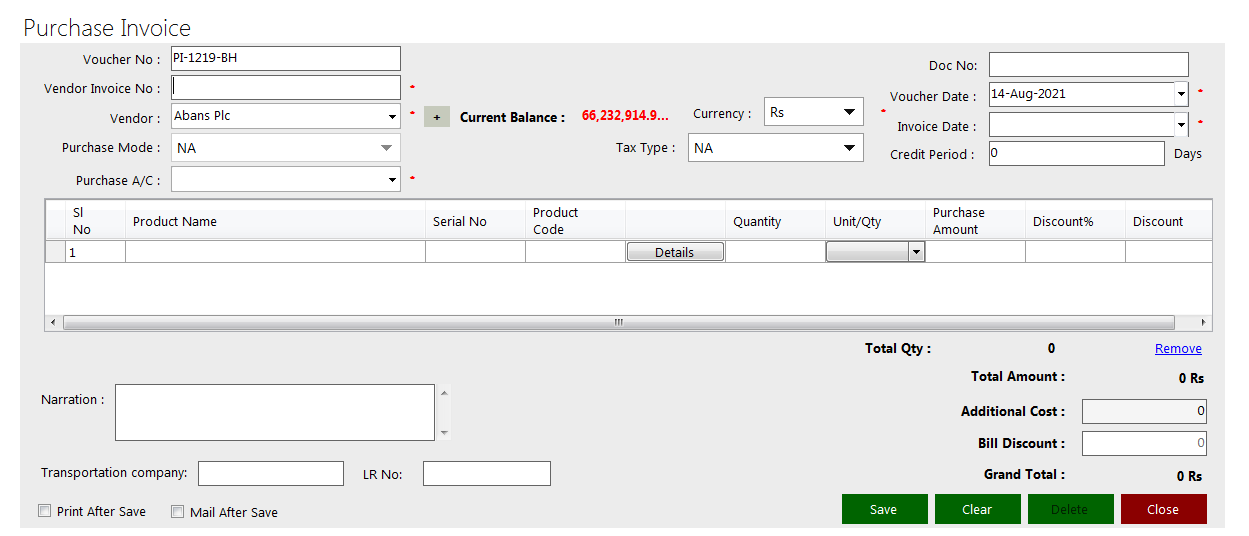
Voucher No: The voucher number automatically appears here. It could give a customized voucher number.
Vendor Invoice No: The user needs to add it here.
Vendor: From whom particular asset has been purchased. Once it clicked on the drop down icon, it loaded all created vendors. Incase if the vendor has not yet created, by click on the + sign next to Vendor the user directed to the vendor creation form. At the moment the user can create vendors using that option.
Purchase A/C: : Here it needs to select the relevant fixed asset account which is the asset value need to Debited.
Tax Type: : Once it clicked on here, it loaded a drop down list as shown below. That is to select whether the asset is applicable of tax and if yes, whether it is applicable for product value or for bill value.
Doc No: If needed it could be added a document number here.
Voucher Date: The current date appears by the system itself.
Invoice Date: The user needs to enter the invoice date hare.
Credit Period: If it has given a credit period by the Vendor, it could be added here.
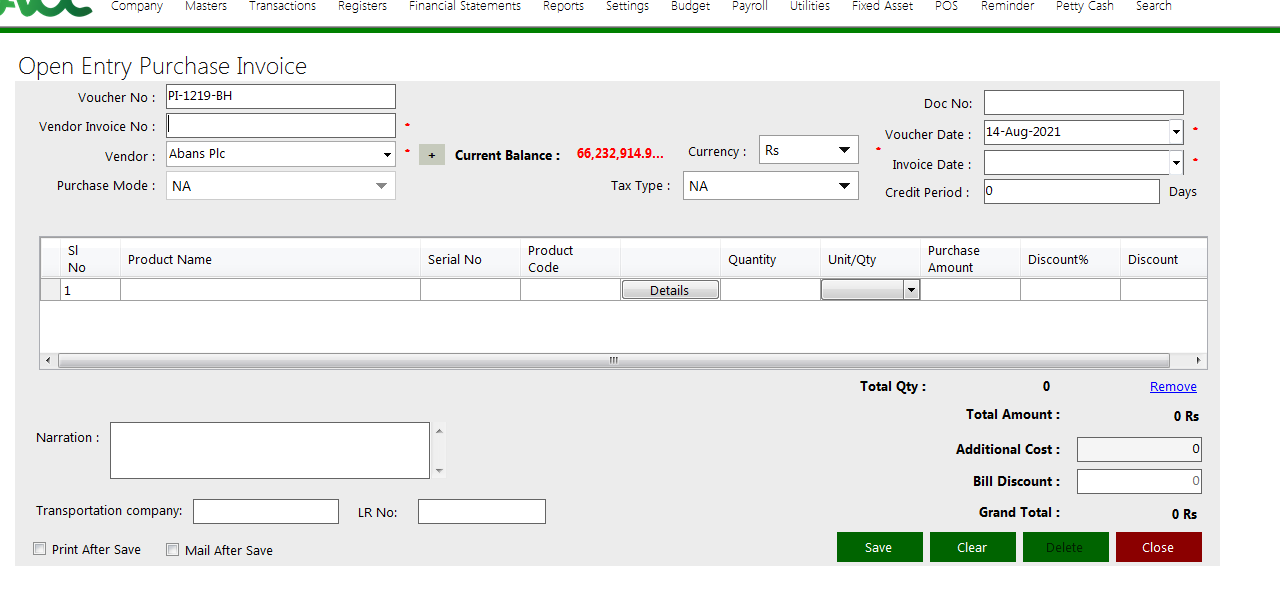
Location: Fixed Asset >> Fixed Asset Open Entry Purchase Invoice
This option is to enter the asset details which have been purchased in the previous financial years. Once it raised an open entry invoice the asset value just hit into the relevant reports and as well as for depreciation purposes. The interface of the open entry invoice is same as the purchase invoice only the difference it there is no PURCHASE ACCOUNT to be selected in the open entry invoice. All other details remain as it is.
Location:Fixed Asset >> Fixed Asset Disposal
This is to enter the details related to fixed assets sales or disposal. The interface of the vouchers as follows.

Invoice No: The invoice number is appeared automatically. Can customize.
Customer: Here, the customer is the party who going to purchase the asset. The customer could be selected from the drop down list. At the moments, when the sales invoice is generating also can could be created the customer by clicking on + mark next to Customer field.
Sales A/C: As the sales account, it needs to select the DISPOSAL LOSS/GAIN account here.
Sales Man: If it has an assigned sales man for the particular transaction, he or she can be mentioned here.
Date: The current date appears automatically.
Credit Period: If the company has decided to confirmed credit period, it can be added here.
Tax Type: Tax details can be selected here.
Location: Fixed Assets >> Fixed Asset Revaluation
This option is to do the adjustments related to fixed asset revaluation. Once it go through the above path, it appears the window shown below.
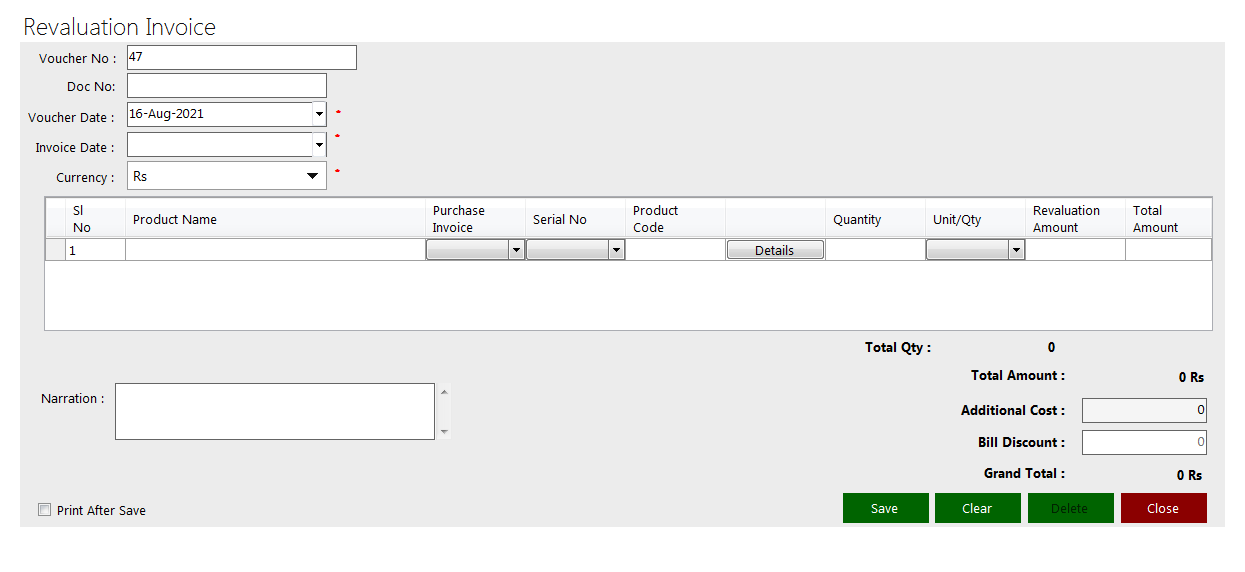
Voucher No: Automatically loaded as sequence.
Doc No: If need to enter any document number, it could be added here.
Voucher Date: Current system date appears automatically.
Invoice Date: Invoice date need to enter here.
Currency type: The user can select the currency type here.
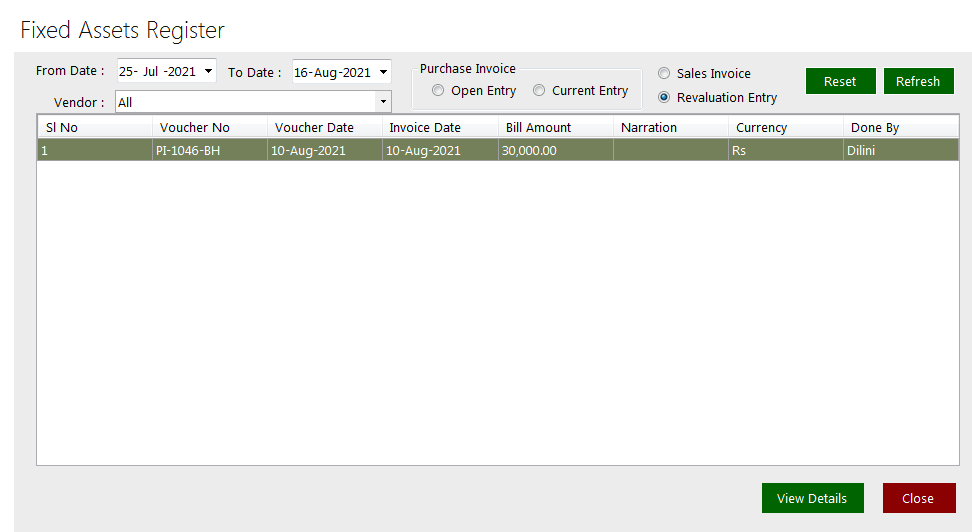
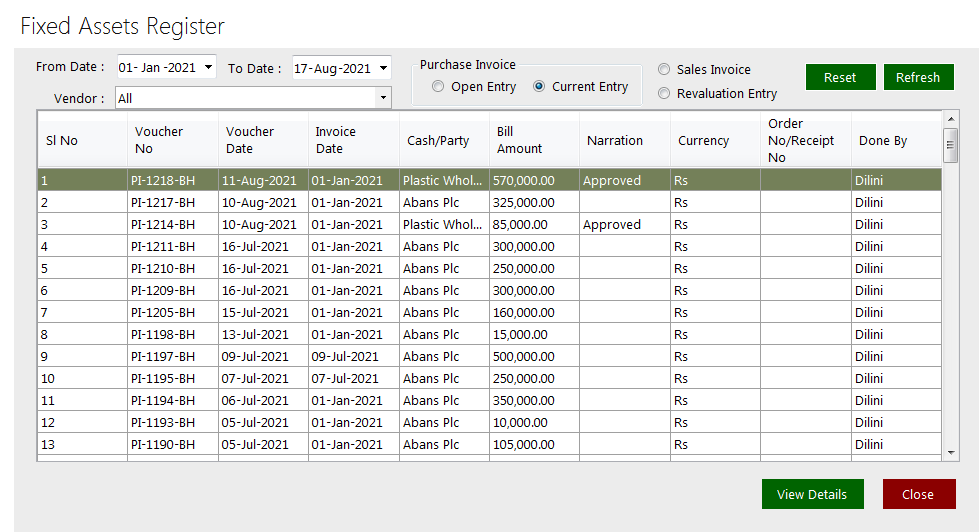
Location:Fixed Asset >> Register
Once it went through the path, it loaded the shown window below. It provides a summary of all Fixed assets transactions which have been done. The user can filtered the required date and then see the summary of each transaction type in the register.
Location: Fixed Asset >> Depreciation Scheduler
This is where the user can run the depreciation either by monthly, quarterly or annually. The interface is shown below.
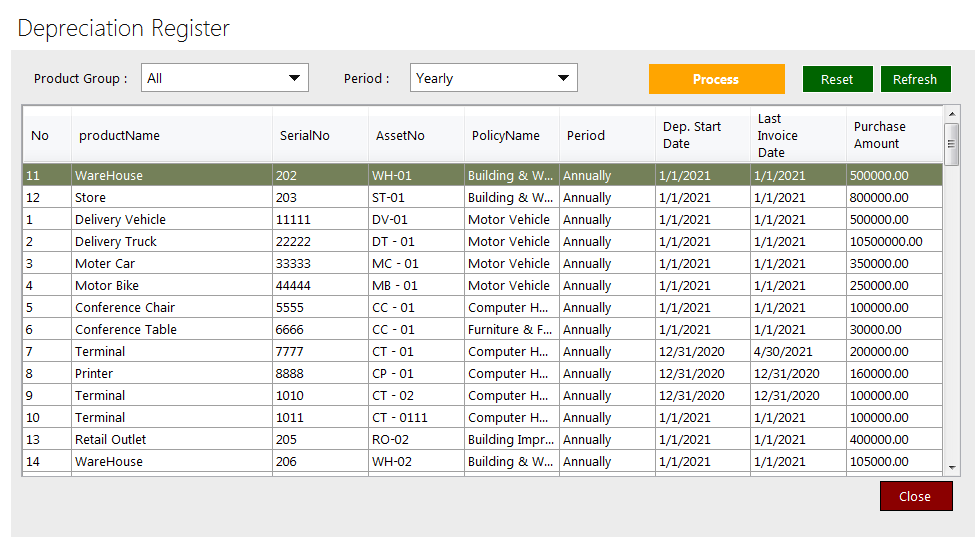
Here, the user can select product group from the PRODUCT GROUP filtration, and from the PERIOD filtration the user can filtered the period of depreciation. Once it filtered the required details, then the user can process depreciation by click on PROCESS button. After that the relevant depreciation ledger entries are passed automatically as,
Fixed Asset Depreciation Account Dr
Accumulated Fixed Asset Depreciation Account Cr
RESET: This button is to clear all filtered details.
REFRESH: Once it clicked on this button, it loaded all filtered data.
CLOSE: This is to close the window.
Location: Fixed Asset >> Reports >> Fixed Asset Listing
This report indicates the fixed asset summary of all fixed assets along with their specifications. The report interface is shown below.
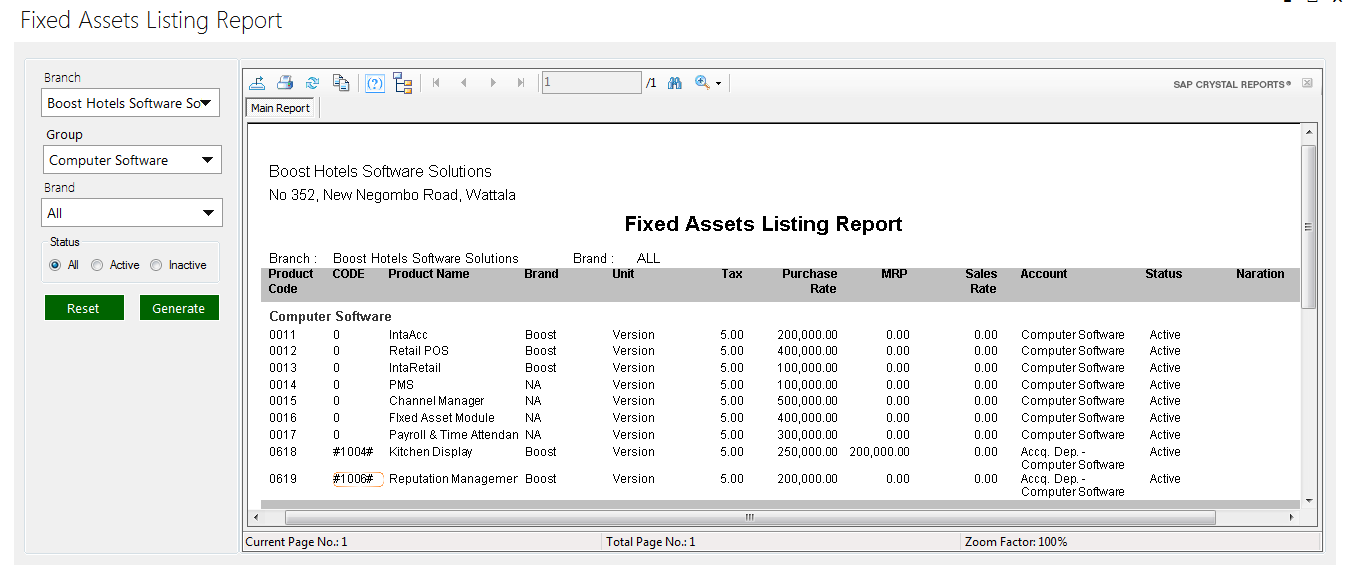
Branch: The user can view or generate the report as branch wise or one report for all branches. Once it clicked on this drop down icon, it appears all branches which have created in the system.
Group: This is to select the Asset group as needed.
Brand: The user can view the report by Brand wise also.
Status: This is to select the Asset status as they ACTIVE or INACTIVE.
Reset Button: The user can clear all filtered data by clicking on this option.
Generate Button: After selecting all required details, the user can generate the report by clicking on here.
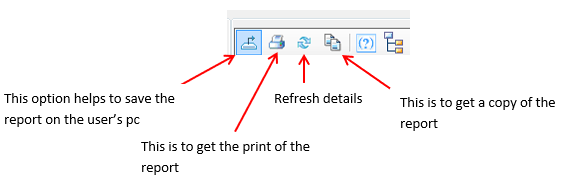
There are few icons in top of the generated report, which help to perform some tasks as stated below.
Location: Fixed Asset >> Report >> Fixed Asset Register
This report indicated all details related to the fixed assets as shown by the interface below. The user can filtered the field and review and generate the report as the way he or she want to have it. There are flirtations options as time period, branch, vendor, group, product & the serial number as well.
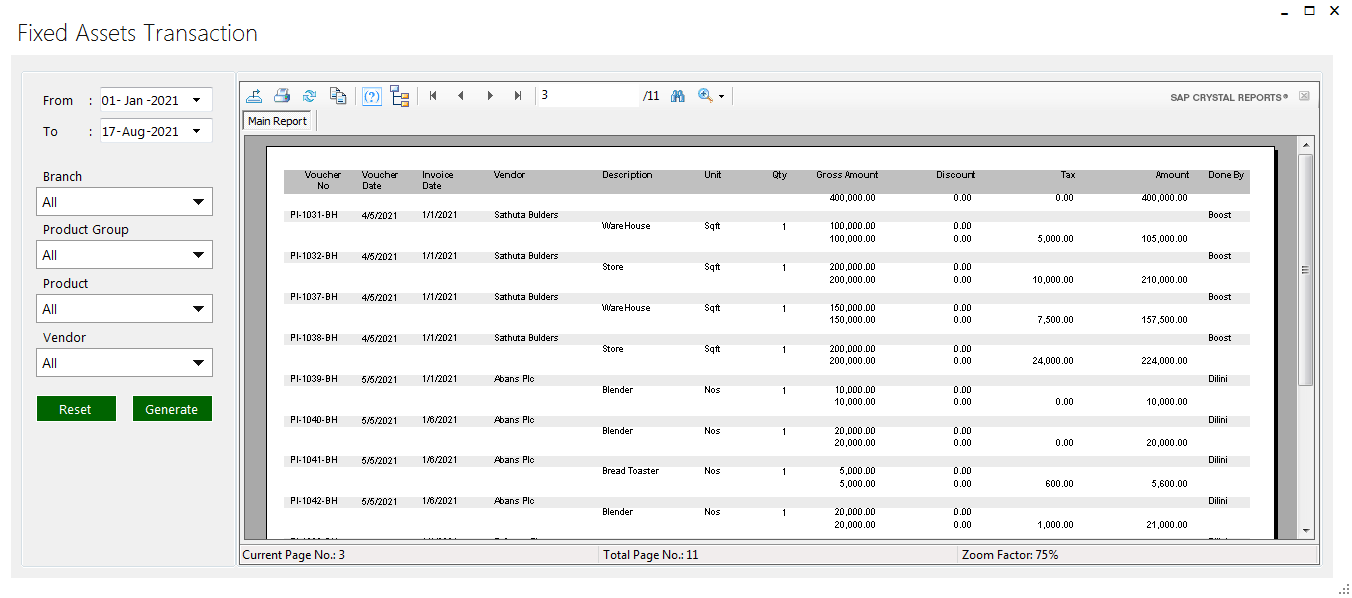
Location: Fixed Asset >> Reports >> Fixed Asset Transaction Report
This report summarizes all fixed asset purchase transactions happened during the selected time period.
Location: Fixed Asset >> Reports >> Fixed Asset Detail Summary Report
This report is one of most important report. It indicated all transactions have been happened to each asset individually. It indicates transaction amount under the related column of transaction type.
Location: Fixed Asset >> Reports >> Fixed Asset Category Summary Report
This is the summary report of fixed asset detail summary report. This report indicates same details as asset group wise.
Location: Fixed Asset >> Reports >> Depreciation Transaction Report
This report indicates all details related to the fixed asset depreciation along with their periodical depreciation.
Location: Fixed Asset >> Reports >> Depreciation Details Summary Report
This is to view and generate total periodical depreciation of each asset.
Location: Fixed Asset >> Reports >> Depreciation Category Summary Report
This is the summary report of depreciation details report. Here, the user can view and generate depreciation as category wise.
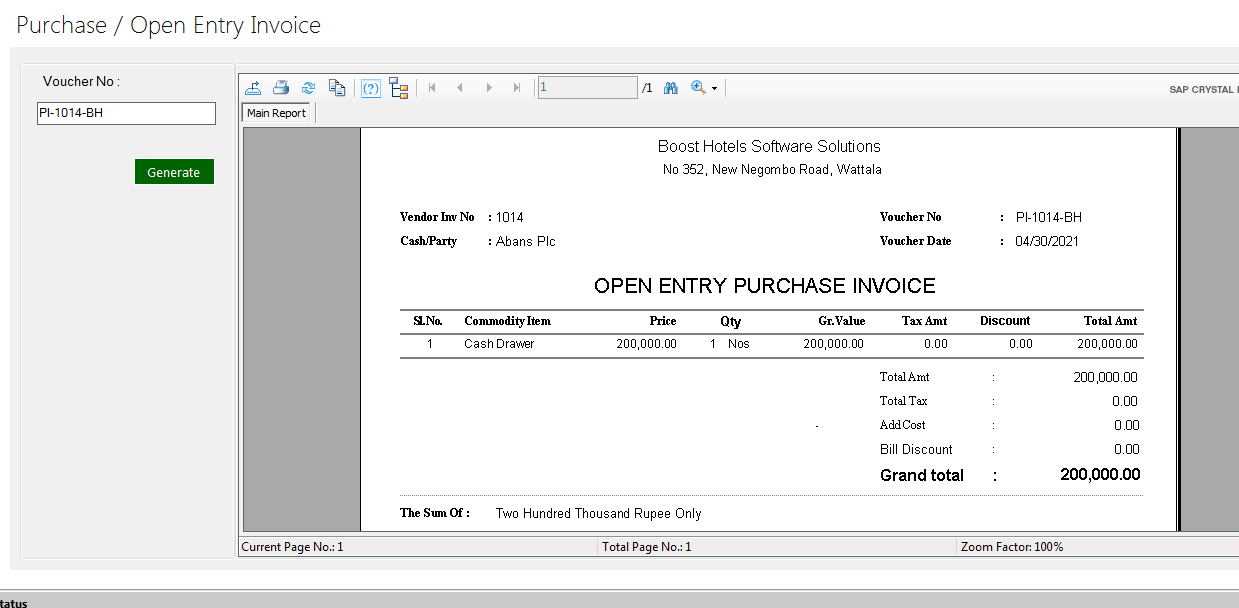
Location: Fixed Asset >> Reports Purchase / Open Entry Invoice
Under this, the user can view and generate each purchase and open entry invoices separately.
Location: Fixed Asset >> Reports >> Fixed Asset Purchase / Open Entry Listing
Here, the user can generate the list of both purchase invoice and open entry invoices separately.
Location: Fixed Asset >> Reports >> Disposal Transaction
If the user needs to view and generate a report which includes only disposal transaction details, the current report fulfills the requirement. The report indicated a summary of all disposal assets along with all their account balances
Location: Fixed Asset >> Reports >> Revaluation Transaction
This report indicates the details of revaluation transactions.
Location: Fixed Asset >> Reports >> Revaluation Loss/ Gain
This report has been generated to view fixed asset revaluation loss / gain of each revaluation transaction.