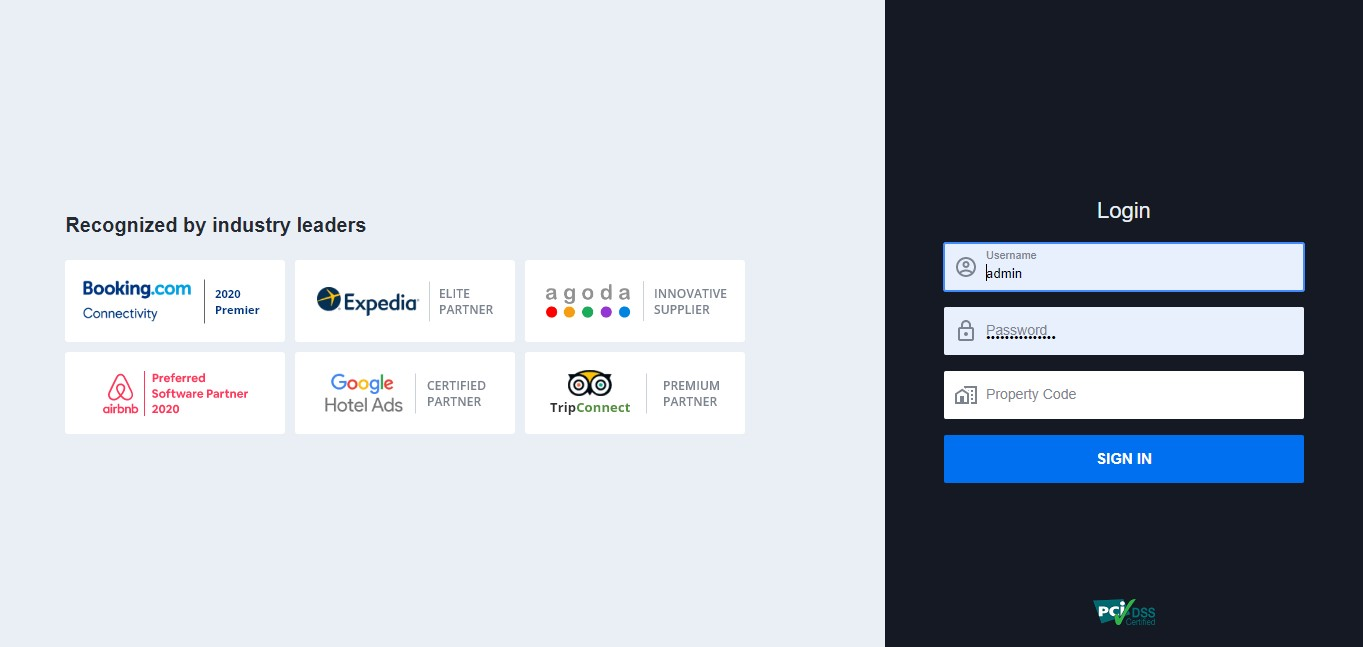
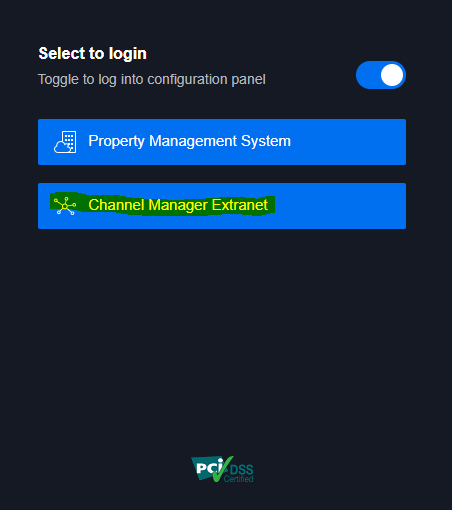
First login to the Boost Centrix page by entering your login credentials, and by clicking on “Channel Manager Extranet” which redirects you to the portal of the Channel Manager. Refer image below
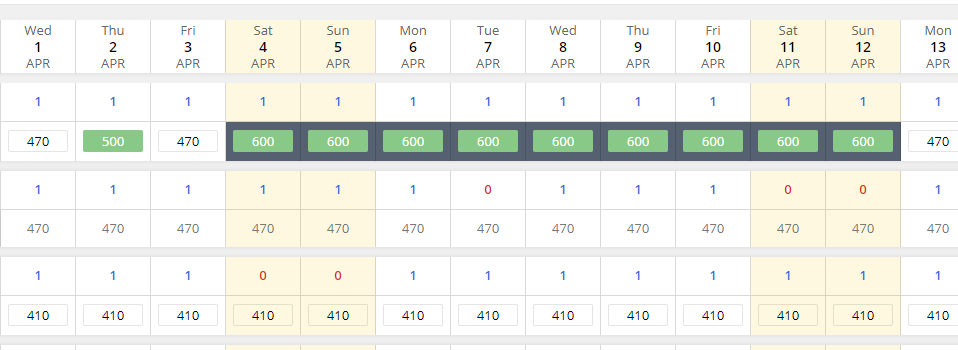
To update the inventory, Click on the “Rates and Inventory option on the dashboard and on the following screen select the source as “OTA Common Pool” and it will show the currently pushed inventory to all Online Travel Agencies you’re connected with. Refer images below

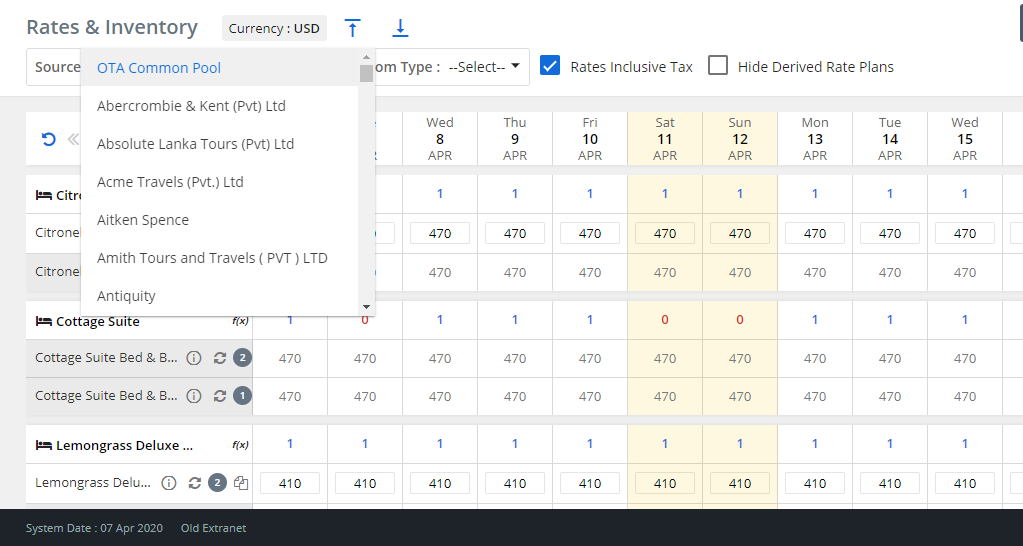
Then simply click on the number of rooms selected for the desired day you want to update room inventory for, and change it by typing in the new desired number.
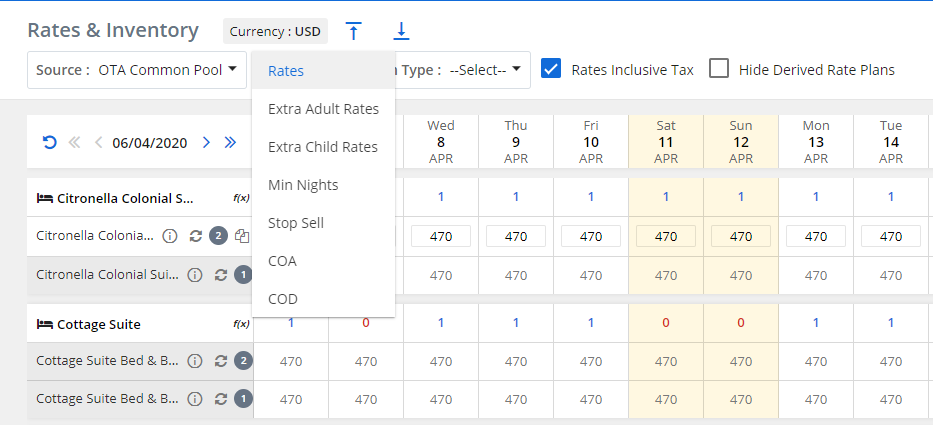
Once you are done click on the “Save” button so the changes will be pushed to all your online channels.
As mentioned before. The login procedure should be continued as the same, and once you get redirected to the dashboard, you should click on option “Rates and Inventory”.
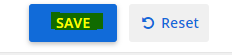
Select the source as “OTA Common Pool” and click on option “Rates”
Then you can simply click on the Rate available for the desired day you want to make the change to and type in the new rate you want to add.
Then click on the save button to update made changes to all your online channels
You can also move your cursor on multiple dates to change rates for a multiple days.
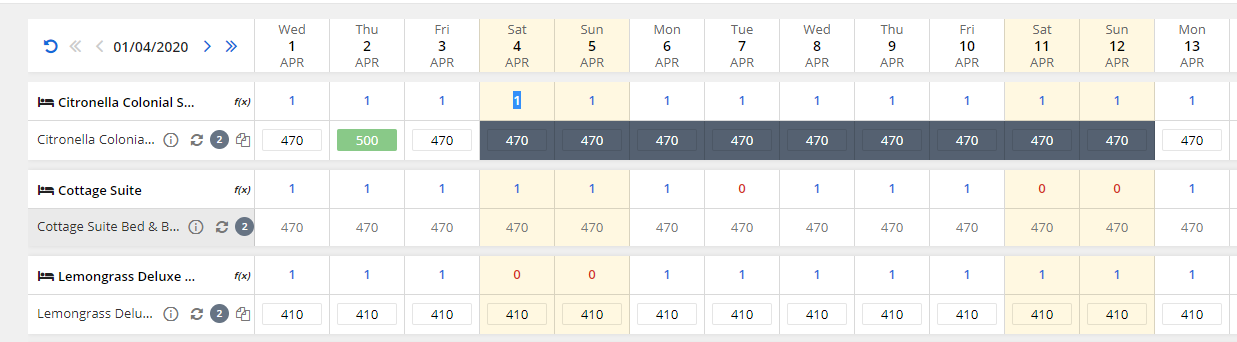
The type in the new rate you desire to update and click on “Save”.
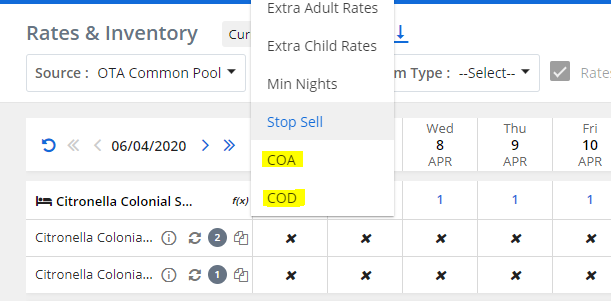
Login to the extranet as shown on previous pages and click on “Rates and Inventory” option. Select the source as “OTA Common Pool” and select option “Stop Sell” on the drop down.
Once you select the option “Stop Sell” you will see crosses on the dates of your calendar and you will crosses on days you have not applied stop sell on.
Click on the cross on selected day/days you want to update stop sell on so it turns to a green tick.
Click on “Save” button to update applied changes to all your online channels.
You can also move your cursor to drag an select multiple dates to apply stop sell option
Once you are done, click on the “Save” button to update applied changes to all your online channels.
NOTE
You can update changes such as Close on Arrival (COA) and Close on Departure similar to the way of applying stop sell.
On the first step, select “COA” or “COD” instead of “Stop Sell”.
Promotions are a newly added feature to Boost Centrix to minimize your visits to each Online Travel Agency’s extranet. With this new feature, now you can update your OTA promotions through the Channel Manager portal itself.
Login to the Channel Manager as shown in the previous pages. Click on “Promotions” tab on the side menu.
Once you reach the “Promotions” page first select “OTA” on view for option and then select the preferred OTA on the “Select OTA” drop down to start creating your promotions.
NOTE
The Promotions options are currently available only for Booking.com and AirBnB. The other channel promotion options will be available in the near future.
Once you select the OTA you will see a list of all available promotions that are unique for each OTA
You can click on preferred Promotion you want to use and create promotion the same way you create promotions on each OTAs specific extranet.
You will be shown the exact same details that are required to be filled by the OTA to create the promotion.
Once all details are added, click on create option to update changes on selected OTA.
Yield Management is a special feature that allows you to change rates of your Online Travel Agencies corresponding to your occupancy percentage at the hotel.
It helps you to maximize your revenue for available rooms by selling them at the right price at the right time.
This feature is only available to you on Boost Centrix
Let’s find out how to use the Yield Management Option.
First log in to the Channel Manager extranet and click on the “Old extranet” option at the bottom of the page. You will be directed to a page shown in the screenshot below.
On this page select the option “Marketing” and click on “Yield” tab.

To manage yield, it’s necessary to create yield tabs. You can do this by clicking on the “Occupancy Slab” option.
Occupancy slab serves the purpose of bifurcating the occupancy into different slabs on the basis of which the rates will be decided.
You can decide how many slabs you’re breaking your percentages to.
Once you select the number of slabs, you click on generate and fill in the percentages you require.
After you add the percentages click on save to create the slabs.
Once you create the occupancy slabs, they need to be mapped with the rate plans. For that we will click on “Slab Mapping” option.
Slab mapping will show you the disabled and enabled rate plans on which the yield management is applied.
Once the source is selected as “Channel” you can then enable yield management on the rate plans you wish to apply it to
Select the rate plans and click on the arrow highlighted below to enable them.
On the basis of the occupancy slabs created, now you can define rates for the Base adults and child or extra adult and child.
Click on Manage Yield option.
Once you reach the Manage Yield Page. First you have to set the source as “Channel” to update rates on your online channels.
After that select the rate plan.
Occupancy slab option rates will be defined on the basis of the slabs created.
The Base column on the chart allows you to modify the formula for setting appropriate base rate for adult and child.
Extra adult column lets you define rates for Extra adult and same applies to Extra child.
On the effect column, you can pre define the conditions by which the system will automatically add or multiply the base rates.
The Factor column will be the number by which the addition or the subtraction will take place on the base rate.
The option which says “I want to update” allows you to update the yield for a specific date range or pre- defined season.
You can also do it for a specific day of week using the “Apply for days” option.
On the basis of the set yield, you will get the yield report on the “Yield report” Option.
Inside the yield report option there are 2 different tabs.
The first one is Yield definition, this will show the yield rate set for different rate plans.
The second tab “Yield Rate Projection” will show you the occupancy of the rate types in percentage
The rates are derived as per the formula set in the occupancy slabs.
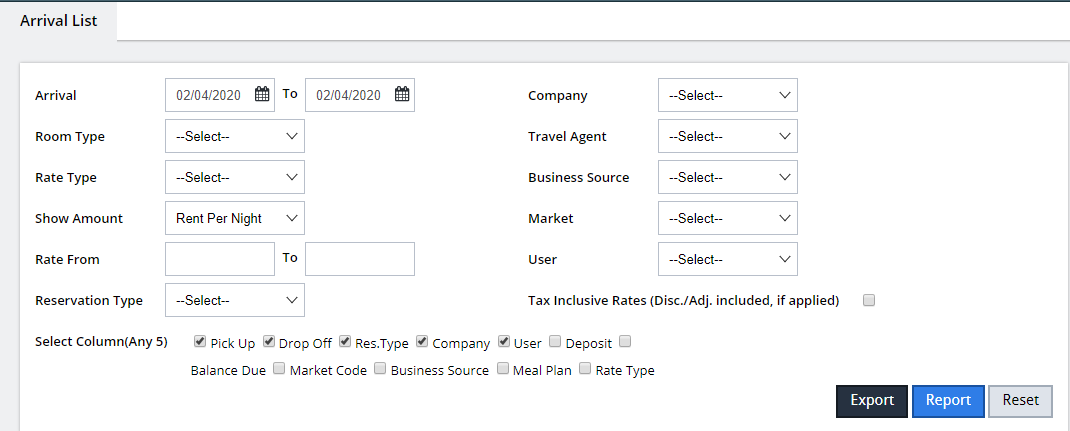
Do you want to see all your reservations on 1 page? Here’s the option, the Booking List. Once you log into the system, click on the side menu and select “Bookings” option.
In booking list a user can view the bookings they have received from the Internet Booking Engine and other resources.
The bookings can be filtered on the basis of


Reports play a vital role engaging the performance of your hotel.
Once you log into the system, click on the side menu and select “Reports” option.
The available reports in Boos Reservations are,