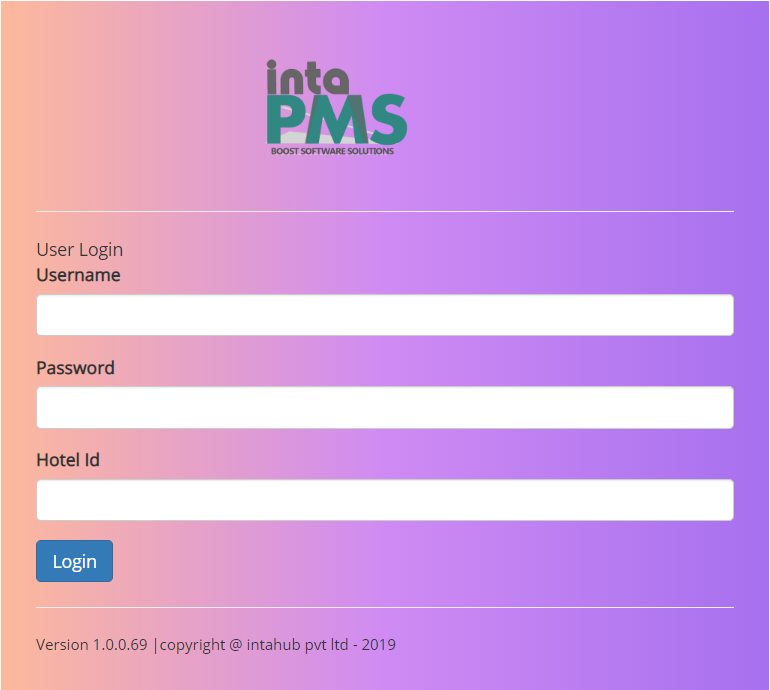
You need to use the front office login link to login to Boost Absolute Front Office and manage the daily tasks at your hotel
As soon as you login to the front office, you will notice the simple yet detailed screen view to manage your hotel. There are in all 2 different views in which you can view the property details using Boost Absolute.
As soon as you login to IntaPMS Front Office, you will notice the Stay View, which on a single screen displays a complete status of your property/hotel.
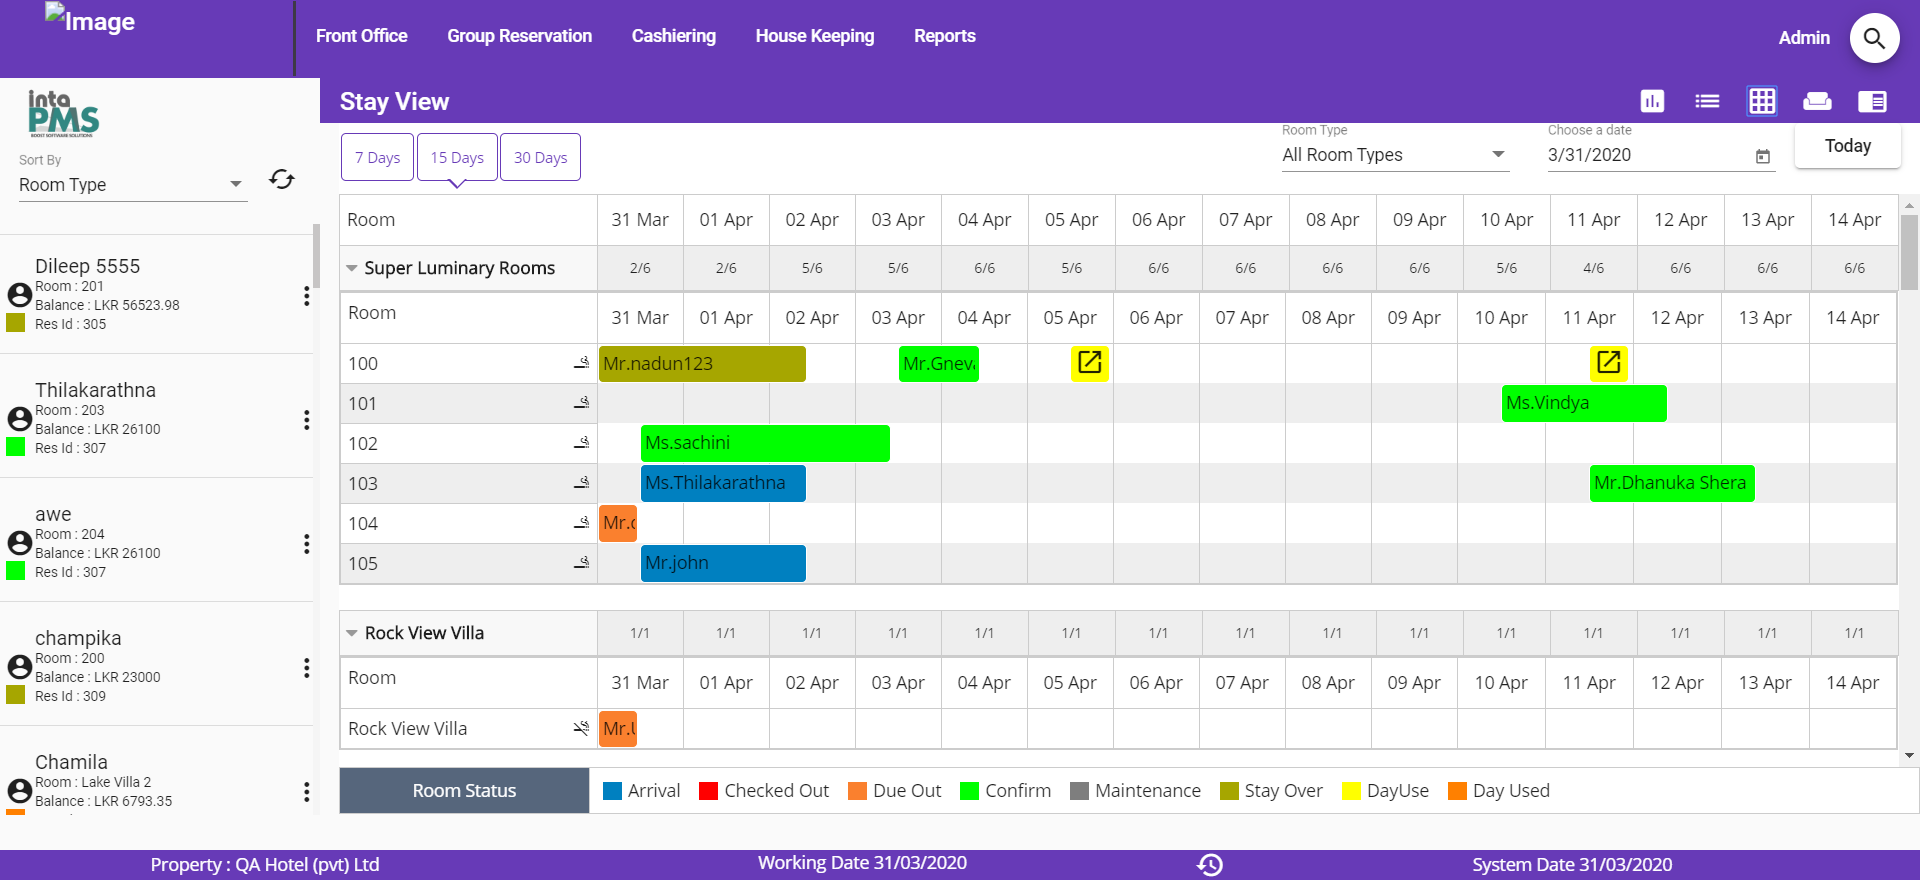
The Stay view is designed to make your work simple and easy

The left most block of the stay view screen on the Front Office console of IntaPMS, lists all the rooms with the guests name for which they are reserved with the - to the minute status - of those rooms. To perform any operation on any room listed here in this list, simply double click on it and you will be given a list of quick operations. Select the task that you want to perform by selecting it from the list.
The options you get are:
This option is used mostly to manage a room. This screen will give all the options that a front office user will require to manage a room. When you click on “Edit Transaction” option on any room, you will be guided to the screen where you see the details of the guest staying in the room.
The “Edit Transaction” screen is divided in to 2 parts, one which displays the guest information, stay information and other information like reservation type (if apply), business source information, market information, travel agent information and the company to which the charges might be billed to.
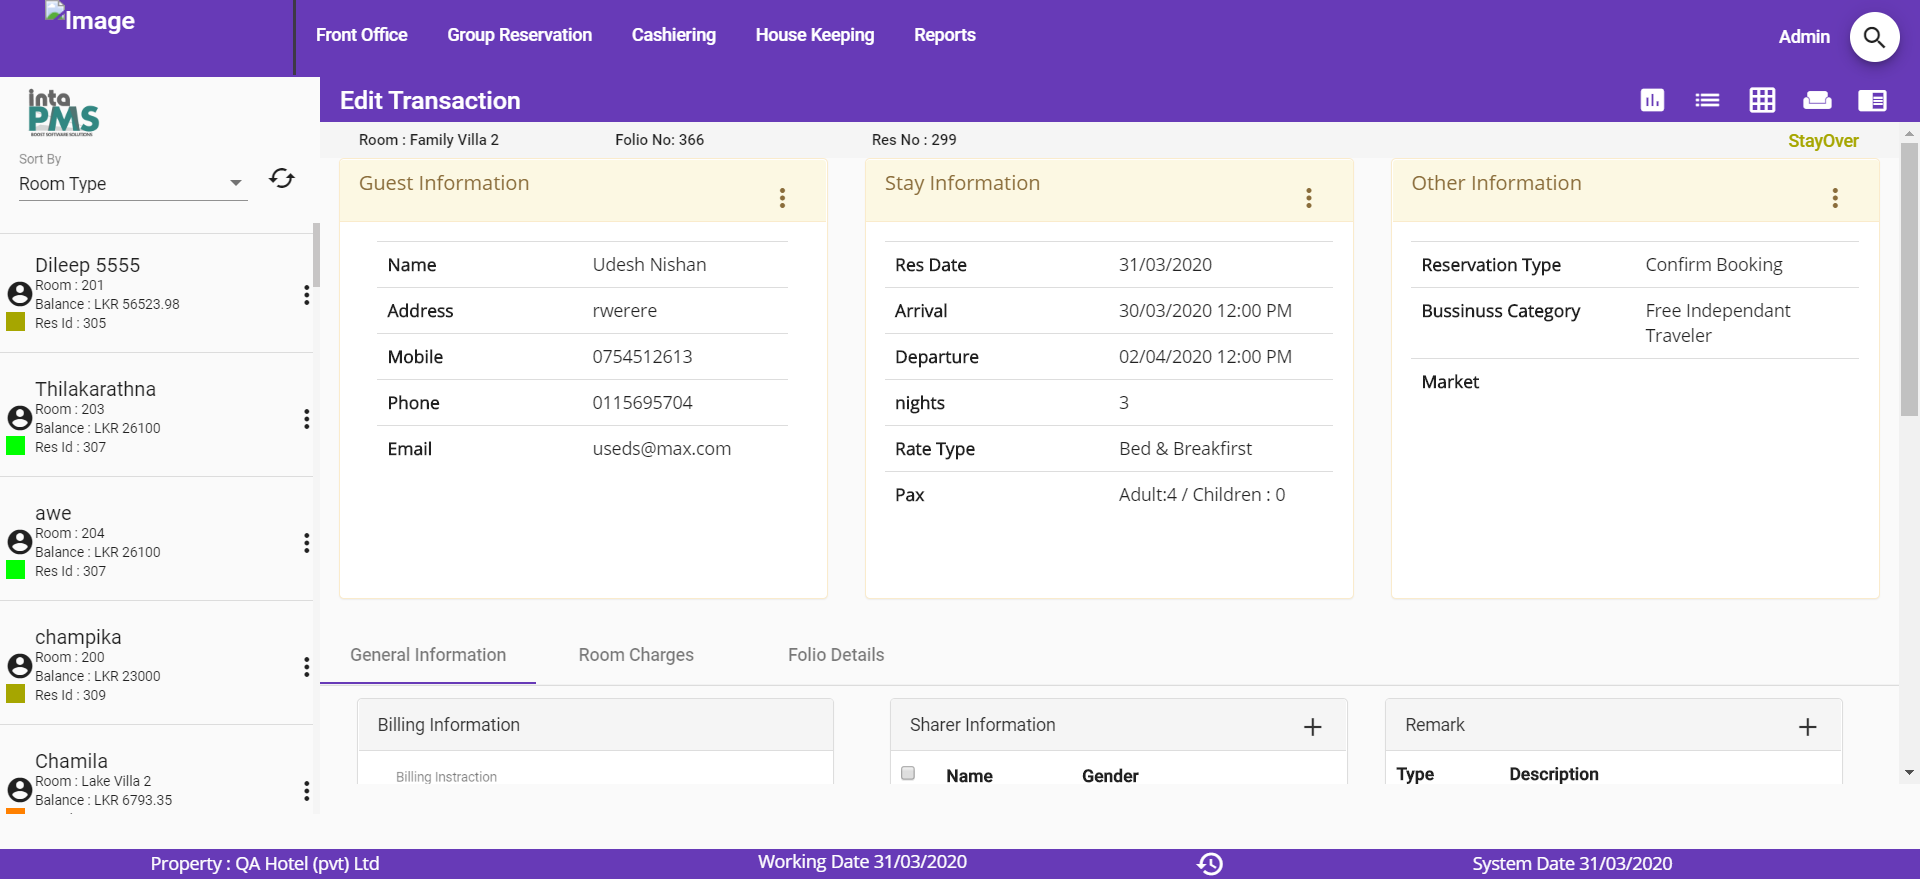
The top right corner of the screen will display the status of the room selected.Towards the bottom of the screen, you can see the “Audit Trail” for the actions performedon this room along with the options to save and cancel the changes made to the screen.
The other half screen has 3 tabs which allow accessing different information related to this room and the guest and also allows performing various actions related to the room and the folio generated for this room.
This tab displays different information like – Billing information, sharer information, remarks entered for the room, and charge summary which shows the total charges, total credits and the balance on the room. If you scroll down you can also see the “Audit Trail” for the actions performed on this room. You can make changes to the above-mentioned information and save the changes too.
You will notice small icons of positive sign on Sharer Information block, Remark block and Inclusion block. This when clicked will allow you to add the information to respective blocks.
The Billing information block will display and allow you to make changes to the billing information for this room like whom should the folio be billed to (guest or company), type of charge(cash or credit), payment method, and many other things.
The Sharer Information block shows the name of the person sharing the room along with the actions that you can perform like – editing the details, take pick up & drop off time, view and print the Guest Registration card, and add the guest to black list.
The inclusion block will allow you to enter the details of any extra charge that you want to post to this room with the option to enter the charge, posting rule and charge rule. You can also select the folio from the drop down list if there is more than one folio created for this room.
Room charges tab, as the name says helps to list and manage the room charges.
You can manage the rate offered, rate type offered, pax information and discount from this screen. To change or update any information, simply click on the respective icon in the “Action” column for the date you want to make the changes to, the resulting field will be activated to enter the changes.

Select the action by selecting the radio button to apply the changes to selected dates, or if you want to apply the changes to the whole stay. Once selected, click on apply
This tab shows the folio details of the room as well as gives ample options to perform operations on the folio.
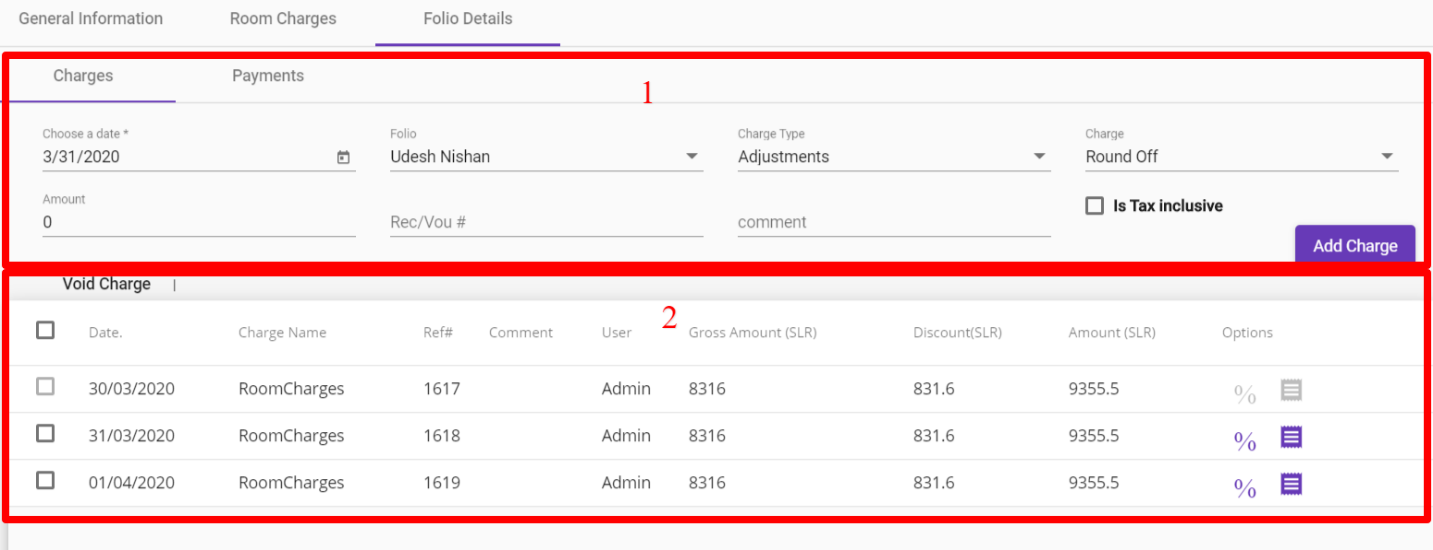
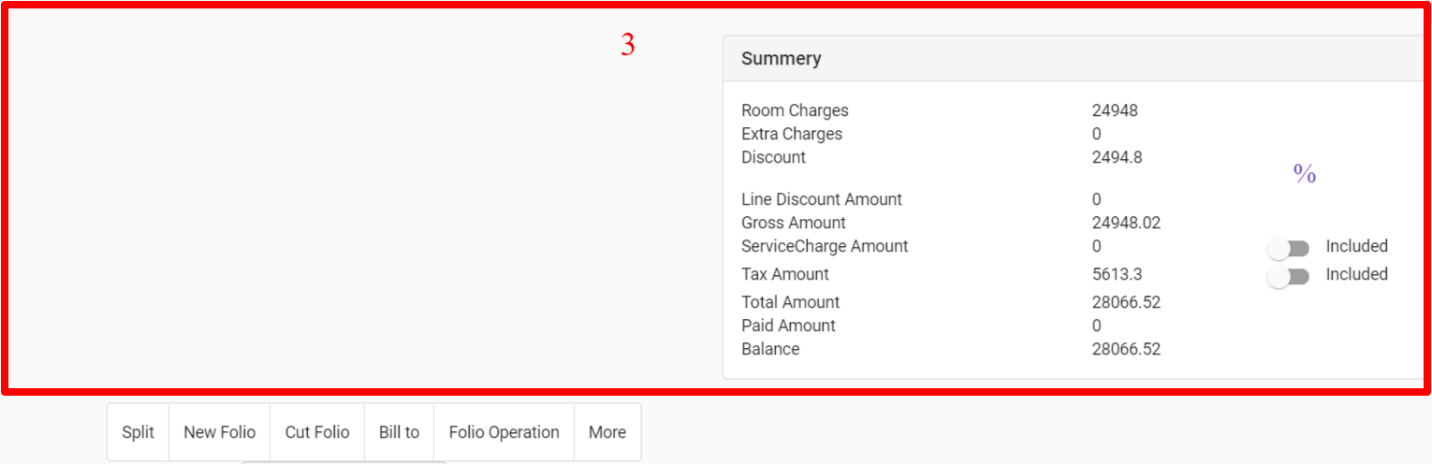
As outlined in the above screen shot, the screen has buttons and options which can be divided in 3 different groups to understand the function of this screen.
Group 1 helps to post a charge on the folio by selecting the options from “Type” field. You can take a payment, post an extra charge, make adjustments, post room charges, transfer the charges to another folio, or post the charges to city ledger account.
Select the type; enter the amount, voucher or receipt number, comments if required. Select the folio and click on ADD.
Group 2 is the folio listing which shows all the charges on the room which will be printed on the folio.
You can perform the actions using the buttons provided as explained below.


Let us now go through the options given under the top most part of the Front Office console in IntaPMS

There are 5 buttons on the top panel of Front Office console in IntaPMS. Each one drops down to show more options when hovered with your mouse.
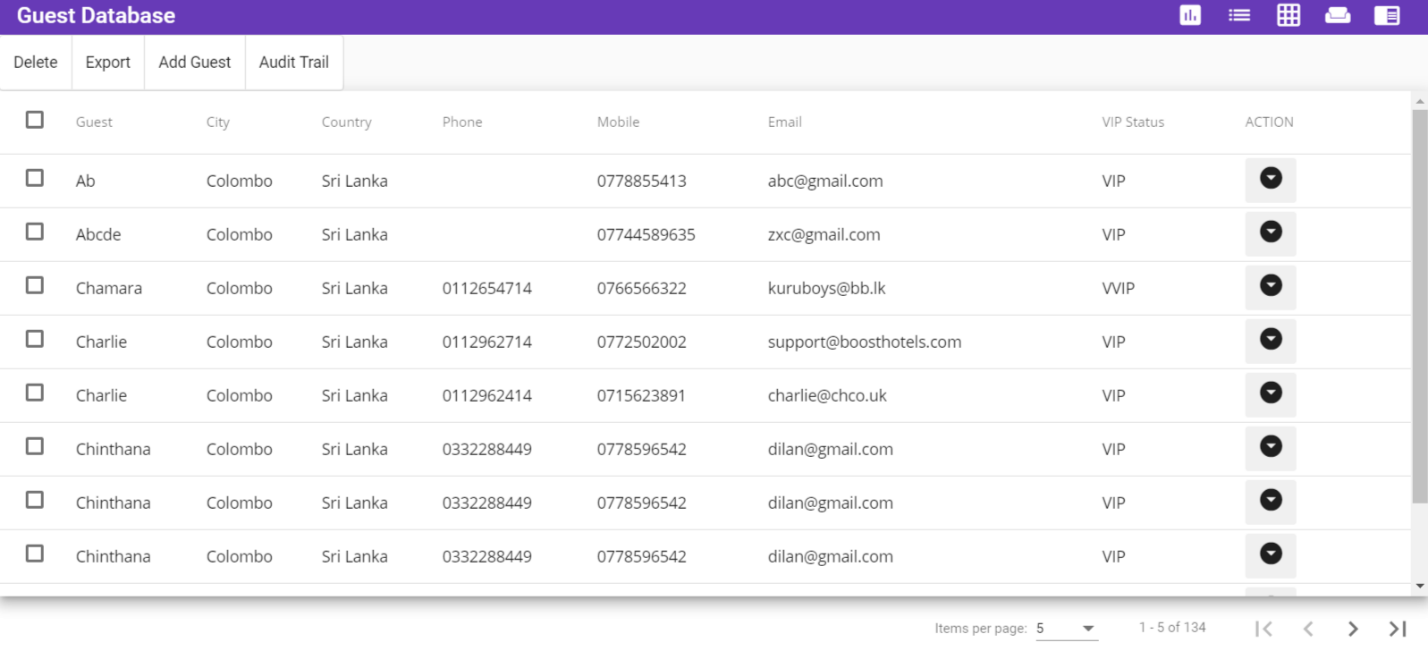
Guest database lists all the guest details that are entered in the system till date. By clicking on any row of the guest database the user will have options to edit the guest details, delete the guest details, black list the guest, or white list the guest. One can also add the guest details from this screen by clicking on the ‘Add Guest’ button in the top right corner of the screen.
We all know that Night Audit is the most important part of the hotel management. Night audit is the process by which we do the day close for the system; it allows the user to change the working date for the software. This process is necessary because it gives users a clear status of what all activities were performed during the day. This can be quickly monitored by the management. It is recommended that this operation be performed by a night auditor or by a user from the Management level.
Night Audit in IntaPMS is performed in 6 simple but important steps listed below:
Step 1 of 6: Pending Reservations
The first step checks for any pending reservations for the day which is currently showing as the working date on IntaPMS. If there are any reservations at all, that may need your attention, they will be listed here with all the basic details along with the “drop down arrow” asking for the necessary action to be taken on the pending reservations. You can void, cancel, mark as No show or do a check-in for the reservation listed as appropriate.
Take the required action, save the changes and click NEXT to move ahead to the next step of the Night Audit.
Step 2 of 6: Release Reservations
This step is for releasing/cancelling the reservations that did not show up for the day which is currently showing as the working date on IntaPMS. The ‘Drop down arrow’ will have the option to cancel the reservation if any are listed on this screen.
When cancelling the reservation, the system gives you the option to charge the cancellation fees and select the reason for cancelling the reservation. Enter the details, save the changes to move on to next step of the Night Audit.
Step 3 of 6: Room Status
This screen will list all the occupied rooms with the guest names along with the arrival and departure information, balance and the room status. The Drop down arrow here on this screen has the options to either amend the stay or do a check out.
The check-out can be performed on zero balance rooms directly from here. If the room balance is non-zero, you will have to go to the room, clear the outstanding balance and then check out the guest from the room.
Take the required action, save the changes and click NEXT to move on to the next step of the Night Audit.
Step 4 of 6: Unsettled Folios
This screen will list all the folios with a non-zero balance. The $ icon gives a user the option to settle the folios by redirecting the user to the folio detail screen.
Take the necessary steps, save the changes and click NEXT to move on to the next step of the Night Audit.
Step 5 of 6: Nightly Charge posting
This screen will list all the occupied rooms with the guest names and the folio numbers along with the description and the amount of the night charge for the working date displayed.
You can select the rooms, that you want the charges to post or simply do a ‘select all’ and click on “Post” button to post the charges to the listed rooms. Once the required action has been taken, click on next to move on to the final step of the Night Audit.
Step 6 of 6: Create New Day
The last step creates a new day by ending the day for which you were doing the Night Audit. After the Night Audit is completed, the data for the last working date will freeze.
Once you agree to this and click on Finish button, the Night Audit wizard closes and the working date on the Front Office console of Boost Absolute changes to a new date.
Net Lock is a feature to protect two or more guests to check in the same room at same time. This feature can be very useful when the software is accessed from various terminals simultaneously. The desk clerks will not be allowed to perform transactions on the same room at the same time from different access points. As soon as one particular room is opened from any other terminal in the network, the software blocks the access to that room with a message that another user is already accessing this room
To unlock the net lock, click on this option, select the room that needs to be unlocked and click on Unlock.
This option when selected shows you the list of all the group reservations taken. You can also edit any group reservation by clicking on the drop down icon.
Apart from the reservation list, the screen also has a search option and different filter criteria to narrow down the search based on reservation number, cancellation number, voucher number, Guest name, Room name/number and type, Business Source, Arrival dates, Reservation dates and type of Reservation.
This option when selected shows you the list of groups that are checked in currently in the property. You can also edit any group by clicking on the drop down arrow.
Apart from the in house group list, the screen also has a search option and different filter criteria to narrow down the search based on folio number, voucher number, Guest name, Room name/number and type, Business Source, and code.
This option when selected shows you the list of groups that have stayed in the property and have departed as of the current date. You can also edit any group by clicking on the Drop down arrow.
Apart from the list of the groups departed, the screen also has a search option and different filter criteria to narrow down the search based on folio number, voucher number, Guest name, Room name/number and type, Business Source, Arrival dates ,and code.
This option gives you the facility to store and manage the travel agent database. This list will also reflect under the business source selection list while taking a walk-in, reservation or booking.
Apart from the regular search options to search a travel agent from the list, the screen also allows you to add a new travel agent.
You can either edit or delete the already listed travel agent information by clicking on the Travel Agent row.
This option gives you the facility to store and manage the company database. This list will also reflect under the business source selection list while taking a walk-in, reservation or booking if the option to “add to business source” is checked while creating an account for the company.
Apart from the regular search options to search a listed company, the screen also allows you to add a new company.
You can either edit or delete the already listed company information by clicking on the Travel Agent row.
With the use of this feature, the hotelier gets the ability to map city ledger folio transfers with payments they receive from city ledger. It gives ability to the hotelier to view records regarding payments they receive from city ledger against which folio.
User can perform below operations from the Payment list.
House status is nothing but the list of all the rooms in your property with their housekeeping status. This screen is used by the Housekeeping Department Head to update the status of the rooms as attended by the housekeepers according to the tasks assigned to them.
The columns for Rooms, status, Remarks, and Housekeeper have different drop down arrows on it which allows you to perform different tasks related to Housekeeping.
This screen lists all the rooms that are blocked along with the reason. The screen also provides edit option for each listed room to either edit the details or un-block the rooms.
If you want to add a room to the block list, click on the “Add Block Room” button in the top right corner of the screen and add the details of the room and the duration for which you want to block it.
This screen lists all the work order created for the housekeepers against the rooms along with the options to either edit the work order or enter a note for the work order.
To add a work order for a room, click on the “Add Work Order” button in the top right corner of the screen and add the details of the work order along with the details of the housekeeper it is assigned to.
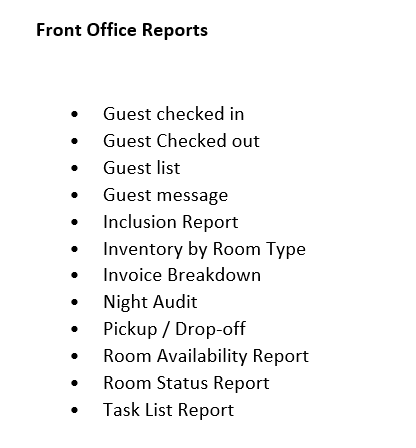
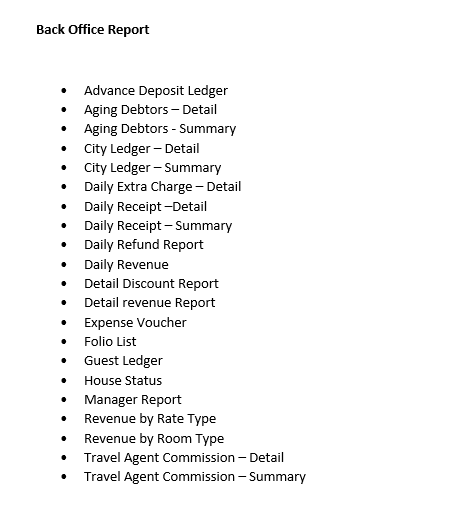
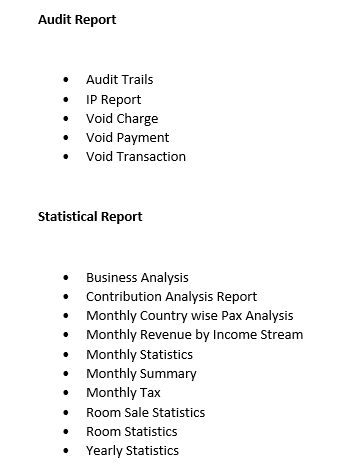
The reports section offers variety of report to keep a check on your business. Currently reports are grouped as below mentioned categories along with the reports that you can find under each of the category. The number of reports is being updated regularly to meet the requirements of the customers and the properties across the globe.

Let us now see the 2nd of the 3 views that Boost Absolute is equipped with. This view is a quick over view of the various aspects of your hotel on a daily basis.
Daily Statistics
This screen will list all the occupied rooms with the guest names along with the arrival and departure information, balance and the room status. The Drop down arrow here on this screen has the options to either amend the stay or do a check out.
Hotel Inventory
The hotel inventory block shows the information for: The total rooms in the property, Out of order rooms for the working date, and total number of rooms available for sale as on the working date.
Total Guests
The total guest block shows the information related to the guests in the property separately for Adults, child and Total. It will list the information for: Current In-house guests, guests due to check out, guests staying over, guests due to arrive today, and the total expected in-house guest count on today’s date.
Future Inventory
The future inventory block shows the inventory information of today’ date as well as for any date in future.
This will show a list of all the room types in your property and show the inventory of 3 days at a time including the day selected from the calendar given.
Today’s Activity Count
This block will show the information for the activity supposed to happen in the property for the working date.
It will list the details like- arrived, Walk-in, Due to arrive, checked out, due out, and Day Use.
House Keeping Status
This block updates the housekeeping status for the rooms which are Vacant or Occupied.
It will list the number of rooms which are – Dirty, Under maintenance, Occupied Clean, Occupied Dirty, and Vacant Clean.